
From Hide to Handbag: How Leather Bags Are Made
From Hide to Handbag: How Leather Bags Are Made
A leather bag looks simple: panels, a handle, a zipper, a lining. The journey from a raw hide to that finished object, however, passes through seven distinct stages and dozens of checkpoints.
As a bag manufacturer, we see every stage daily. This guide walks through the entire production process for a leather bag — what happens at each step, what can go wrong, and what buyers should ask before placing an order.
- Where Every Bag Starts: The Hide Room
- Step 1 — Pattern Making and Sampling
- Step 2 — Cutting the Leather
- Step 3 — Preparing and Skiving
- Step 4 — Stitching
- Step 5 — Edge Finishing
- Step 6 — Hardware and Assembly
- Step 7 — Quality Control
- Packing, Protection and Shipping
- Where Automation Helps and Where Skill Wins
- The Full Production Timeline
- What Buyers Should Ask a Factory
- Cost Breakdown of Making a Leather Bag
- Frequently Asked Questions
- The Bottom Line
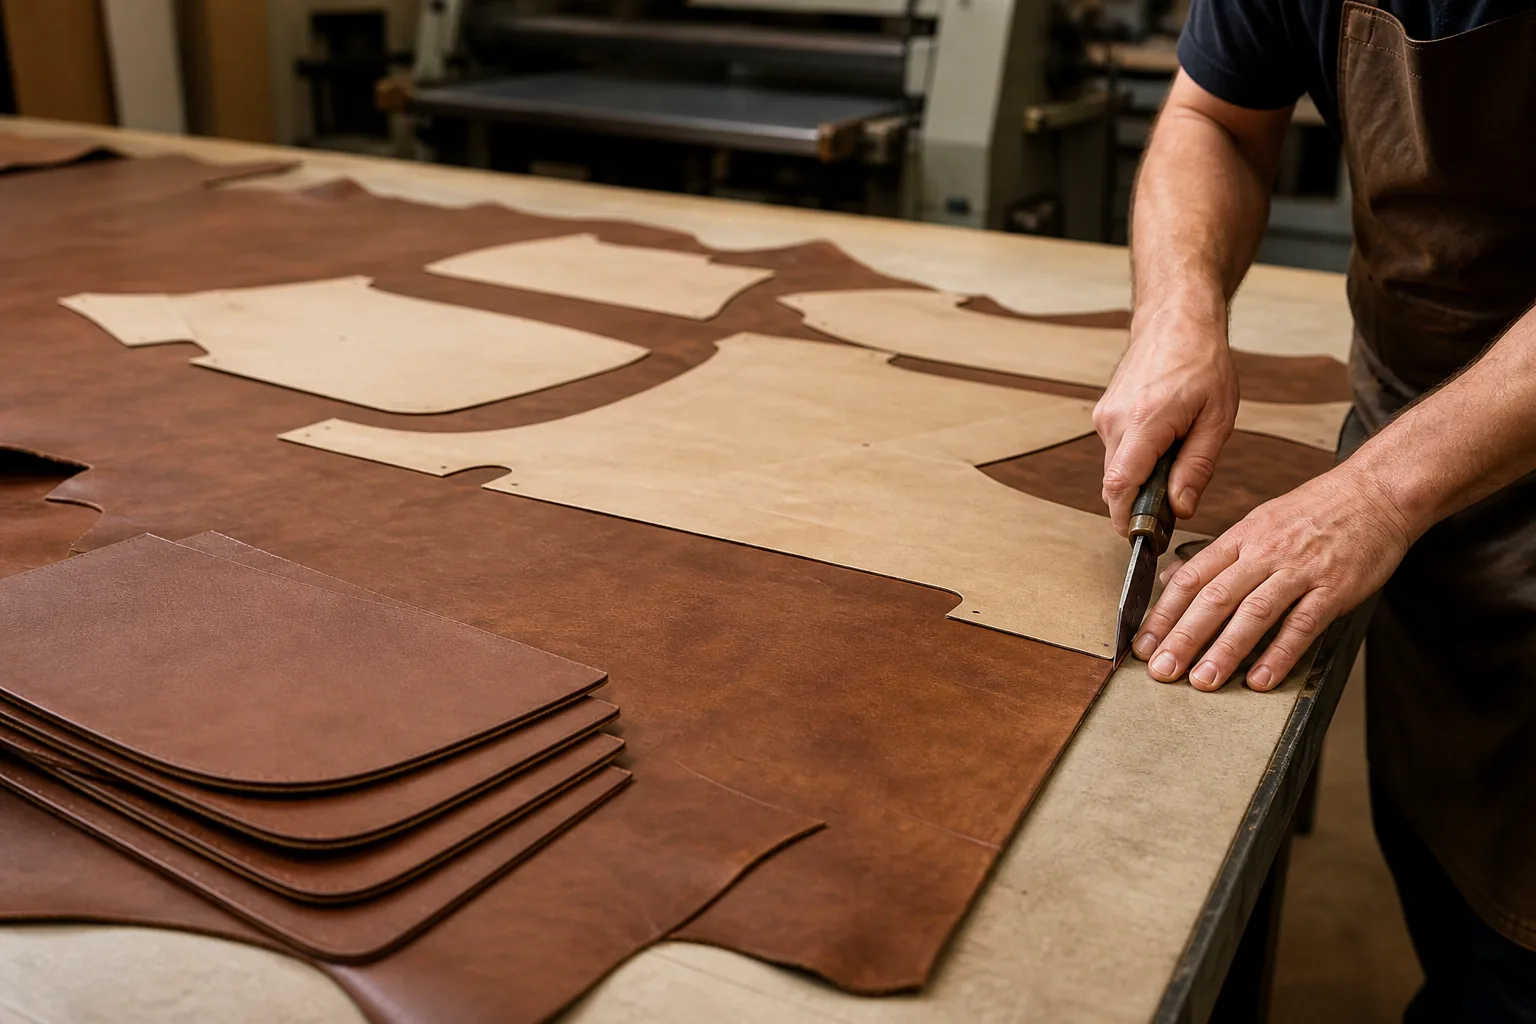
Where Every Bag Starts: The Hide Room
Before cutting, before sewing, before any design decision can be executed, there is a hide that must be inspected and chosen.
Selecting the Hide
Hide selection starts with the bag’s purpose, then works backward to species, grade, thickness, and tanning method.
A structured tote needs firm, thick material. A slouchy shoulder bag needs soft, pliable leather. A wallet needs thin leather that folds without bulk. The wrong hide cannot be fixed by production skill — it can only be replaced, which is why selection happens first and gets the most attention.
Grading and Marking Defects
Every hide is graded and its defects are marked before cutting begins.
Scars, brands, growth marks, tick bites, and holes are mapped with chalk so the cutting team knows where the good area is. This is unglamorous work with enormous consequences: a missed defect becomes a visible flaw in a finished bag, and a bag with a flaw in the wrong place is a return.
Climate Control and Storage
Leather is a hygroscopic material, which means it absorbs and releases moisture with the air around it.
Hides are stored in controlled temperature and humidity, off the floor, out of direct sun, and rotated so older stock is used first. Poor storage causes mold, dry cracking, and uneven color — all of which appear in the finished bag, not in the warehouse.
What Can Go Wrong at This Stage
Most production disasters trace back to decisions made in the hide room.
- Wrong thickness ordered for the design, discovered at cutting
- Hide lot color inconsistent with the approved sample
- Moisture damage from storage, showing as blotches after finishing
- Insufficient quantity for the order, causing mid-production substitution
Each of these errors is cheap to prevent and expensive to fix.
Step 1 — Pattern Making and Sampling
Before a single production hide is cut, the design must be proven as a working pattern.
From Sketch to Pattern Pieces
Designers create a sketch; pattern makers turn it into flat pieces that will assemble into a three-dimensional bag.
Pattern making is engineering as much as design. Panels must account for leather thickness, stretch direction, seam allowance, fold behavior, and how the bag will carry weight. A beautiful sketch with a bad pattern produces a bag that sags, twists, or will not close.
The Prototype Round
The first sample is called a prototype, and it exists to expose problems.
We build it in the intended leather, with the intended hardware, then load it, carry it, and abuse it. Zippers are cycled, straps are hung with weight, edges are flexed. Most designs need at least two prototypes before the pattern is right, and complex bags need more.
Costing and Yield Estimates
Once the pattern is approved, costing turns the design into real numbers.
Pattern pieces are laid out on a hide to estimate yield, and material cost is calculated from that yield rather than from the bag’s dimensions. This is where designers learn that a small design tweak can save a surprising amount of leather — or cost far more than expected.
Why Sampling Decides the Bag
A bag’s quality is largely determined before mass production starts, during sampling.
The sample defines stitch density, edge finish, hardware placement, lining choice, and tolerance limits. When a factory and a brand disagree later, they consult the approved sample. Without one, disputes have no resolution.
Step 2 — Cutting the Leather
Cutting is where material cost is won or lost, and where a hide’s defects become either avoided or visible.
Nesting Panels Around Defects
The cutting team arranges panel patterns to avoid marked defects and to respect stretch direction.
Panels that carry load must be cut from the firmest part of the hide. Visible panels are cut from the cleanest area. Less-visible pieces such as interior pockets can use areas with minor marks. This nesting logic is a skill, and it determines how much usable leather a hide actually yields.
Hand Cutting, Die Cutting and CNC
Three cutting methods dominate leather bag production, and each suits different situations.
| Method | Best for | Speed | Precision | Cost |
|---|---|---|---|---|
| Hand cutting | Small runs, complex shapes | Slow | Operator-dependent | Low setup |
| Die cutting | Repeat production, standard shapes | Fast | High, repeatable | High setup |
| CNC / digital cutting | Prototypes, intricate patterns | Medium | Very high | Equipment-intensive |
Yield: The Number That Decides Profit
Yield is the percentage of a hide that becomes usable panels, and it drives material cost more than any other factor.
A hide yielding 70 percent usable area costs far more per panel than one yielding 85 percent, even at the same price per square foot. Factories compete on yield the way manufacturers in other industries compete on efficiency. Designers who understand nesting produce cheaper, more manufacturable bags.
Cutting Mistakes That Show Up Later
Cutting errors are permanent, because leather cannot be spliced invisibly.
- Panels cut against the stretch direction, causing bags to sag
- Defects missed during marking, appearing as surface flaws
- Panels from different dye lots mixed in one bag, causing shade mismatch
- Edges cut ragged, forcing heavier edge finishing to hide it
Step 3 — Preparing and Skiving
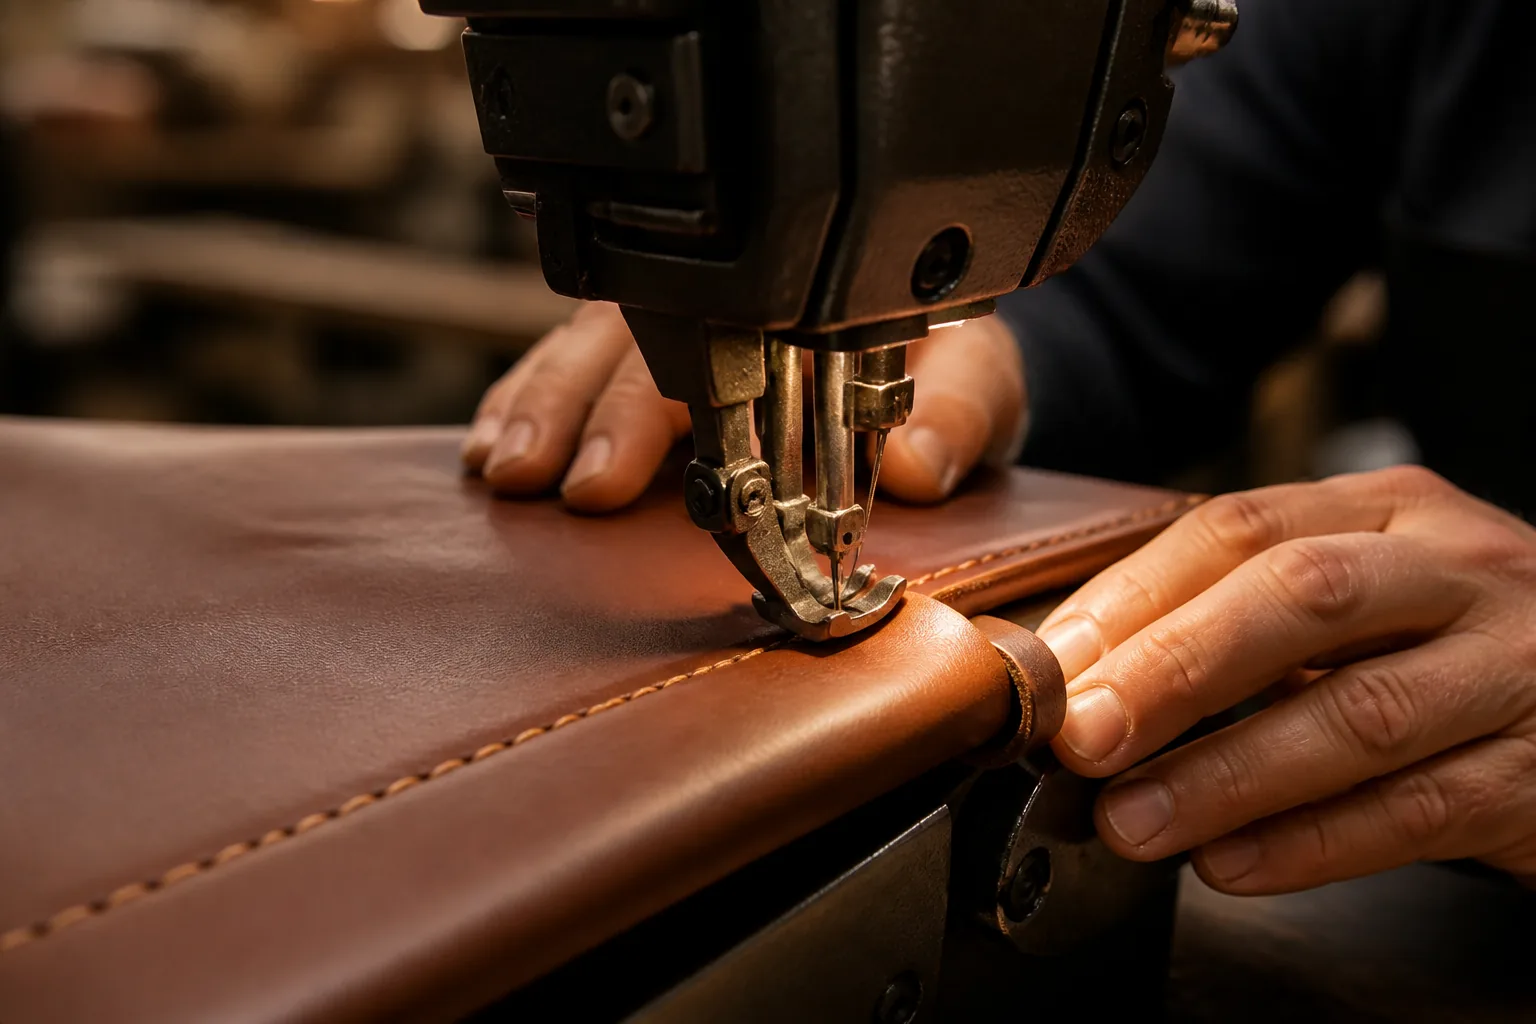
After cutting, panels are prepared: thinned where they fold, reinforced where they carry, and lined where they will be seen.
Splitting and Skiving Edges
Skiving is the process of thinning leather along a fold or seam so the finished edge stays flat.
Without skiving, a folded edge becomes bulky and a seam becomes a ridge. Skiving machines shave leather to a precise taper, and the operator’s skill decides whether the transition is smooth or stepped. Visible edge bulk is almost always a skiving problem.
Reinforcement and Interfacing
Load-bearing areas receive reinforcement: a hidden layer of stiffener, webbing, or firmer leather.
Handles, strap anchors, and hardware attachment points take concentrated load, and leather alone can stretch or tear there. Reinforcement spread across a wider area is what prevents the classic failure of a handle pulling out of a bag body.
Linings and Interlinings
Linings provide the interior finish, and interlinings give the bag its structure or softness.
Suede and fabric linings are common for touch and appearance, while foam or non-woven interlinings shape the bag’s body. Lining quality is often where budget bags cut corners, because a cheap lining is invisible until it tears.
Fusing and Gluing
Adhesive work — fusing interlinings, gluing reinforcements, joining lining to panels — is a hidden but critical step.
Weak or uneven adhesive produces bubbles, delamination, and sagging months after purchase. Heat, pressure, and dwell time must be controlled, which is one reason factories with proper fusing equipment produce more stable bags.
Step 4 — Stitching
Stitching is the most visible manufacturing step, and the one buyers inspect first.
Machine Choices for Leather
Leather demands walking-foot or compound-feed machines, because leather does not feed like fabric.
Standard machines push leather unevenly, producing wavy seams and skipped stitches. Proper leather machines move the material with synchronized feed dogs and needles. A factory’s machine inventory tells you a great deal about what it can produce.
Stitch Types and Thread
Stitch type, length, and thread weight are specified together, and they must suit both the leather and the bag’s load.
Lockstitch is standard for most panels, while saddle stitching by hand appears on premium goods for strength and appearance. Thread must match the leather’s thickness and color, and the wrong thread weight causes either puckering or weak seams.
Seam Strength at Stress Points
Every bag has predictable stress points: handle roots, strap anchors, zipper ends, and base corners.
These points receive double stitching, bar tacks, rivets, or reinforcement panels. A well-made bag can be identified by looking only at these four places, because that is where factories that care spend additional minutes.
Common Stitching Defects
Stitching defects are easy for a trained eye to spot and impossible to hide later.
- Skipped stitches, usually from feed or needle problems
- Uneven stitch length, indicating inconsistent machine control
- Seam puckering, from thread tension or thread weight mismatch
- Wavy panels, from stretching during sewing or poor feed
Manufacturer’s point: When we audit a new production run, we do not start with the leather. We start by counting stitches per inch on the handle roots. If they are consistent and dense, the rest of the bag is usually built with the same discipline.
Step 5 — Edge Finishing
Edges are where a bag’s quality becomes visible at arm’s length, and where cheap bags betray themselves.
Painted Edges
Edge paint is applied in thin layers, dried, sanded, and reapplied to build a smooth, sealed edge.
Quality painted edges are smooth, uniform, and slightly rounded, with no drips or cracks. Paint hides the leather’s raw edge, which is why it is common on chrome-tanned leather and on cost-sensitive production. Poorly painted edges crack within a season.
Burnished Edges
Burnishing uses friction, moisture, and wax to seal and polish the edge of vegetable-tanned leather.
A well-burnished edge is glassy and durable, and it ages beautifully with the leather. It requires denser fiber and more labor, which is why it appears mainly on higher-grade bags. Burnishing is a mark of craft, and it cannot be imitated by paint.
Folded and Bound Edges
Some edges are folded over and stitched, or wrapped with a binding strip, to present a finished fabric or suede surface.
Folded edges add strength and a clean look, especially on soft leather where burnishing is impractical. Binding is common on heavily used interior edges, because it protects the raw leather from abrasion.
Which Finish Belongs on Which Bag
Edge treatment should follow the leather and the bag’s price position, not a designer’s preference alone.
| Edge finish | Typical leather | Labor level | Best suited to |
|---|---|---|---|
| Painted | Chrome-tanned, coated | Moderate | Volume production, fashion bags |
| Burnished | Vegetable-tanned | High | Heritage and premium bags |
| Folded | Soft leathers | Moderate to high | Slouchy bags, interiors |
| Bound | Any | Moderate | High-wear interior edges |
Step 6 — Hardware and Assembly
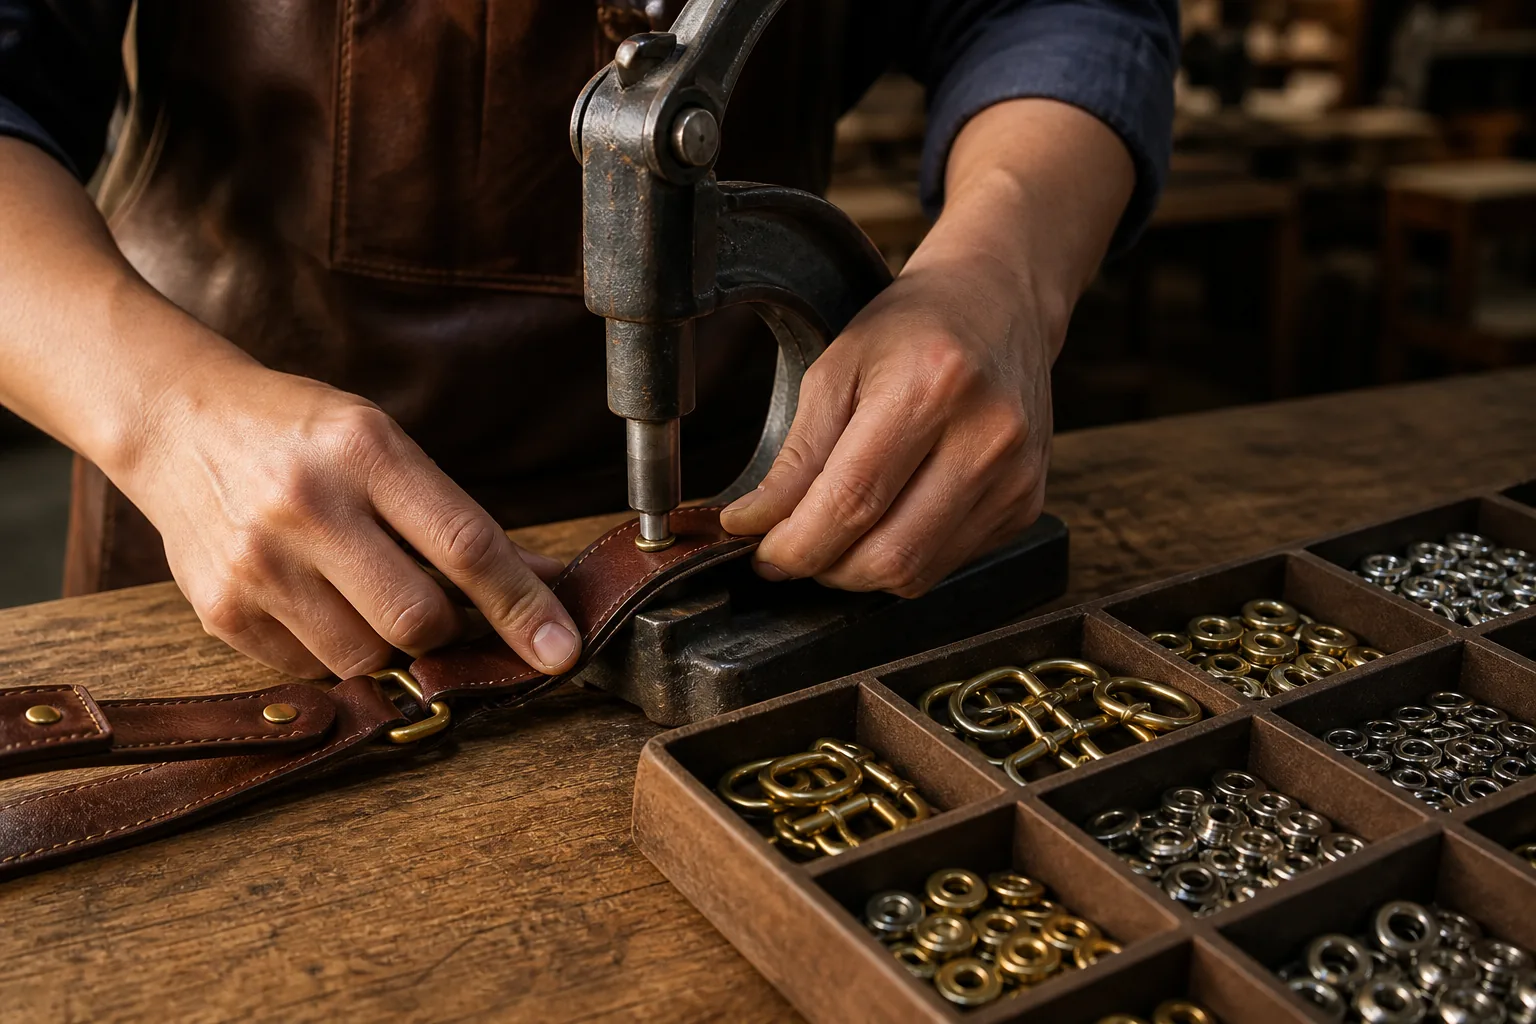
Hardware is the jewelry of a bag, and it is also a load path that must be engineered, not just selected.
Choosing the Hardware Set
Hardware is chosen as a coordinated set: buckles, rings, snaps, zippers, and feet that match in finish and scale.
Finish choices — brass, nickel, antique brass, gunmetal — must be consistent, because mixed finishes look accidental. Beyond appearance, hardware must be rated for the load the bag will carry, which is why a heavy tote needs thicker rings than a clutch.
Rivets, Screws and Press Studs
Attachment method determines whether a fitting stays attached for years or loosens in months.
| Attachment | Strength | Serviceability | Typical use |
|---|---|---|---|
| Solid rivet | Very high | Not removable | Strap anchors, handles |
| Screw post | High | Replaceable | Buckles, decorative plates |
| Press stud / snap | Moderate | Replaceable | Flap closures, pockets |
| Stitched only | Moderate | Repairable | Light-stress fittings |
Reinforcement Behind the Hardware
Every fitting needs material behind it that can carry the load it transfers.
A ring bolted through a single layer of leather will eventually tear through, no matter how strong the ring is. Good construction adds a reinforcement panel, a folded strap end, or a doubled layer. This is invisible in the finished bag and decisive in long-term use.
Zippers and Pulls
Zippers fail more often from installation than from manufacturing defects.
Tape must be stitched so the zipper runs straight, and the slider must match the tape width and the load. Metal zippers with cast sliders survive heavy use; lightweight nylon zippers suit interior pockets. Pulls should be attached so they can be replaced without cutting stitches.
Step 7 — Quality Control
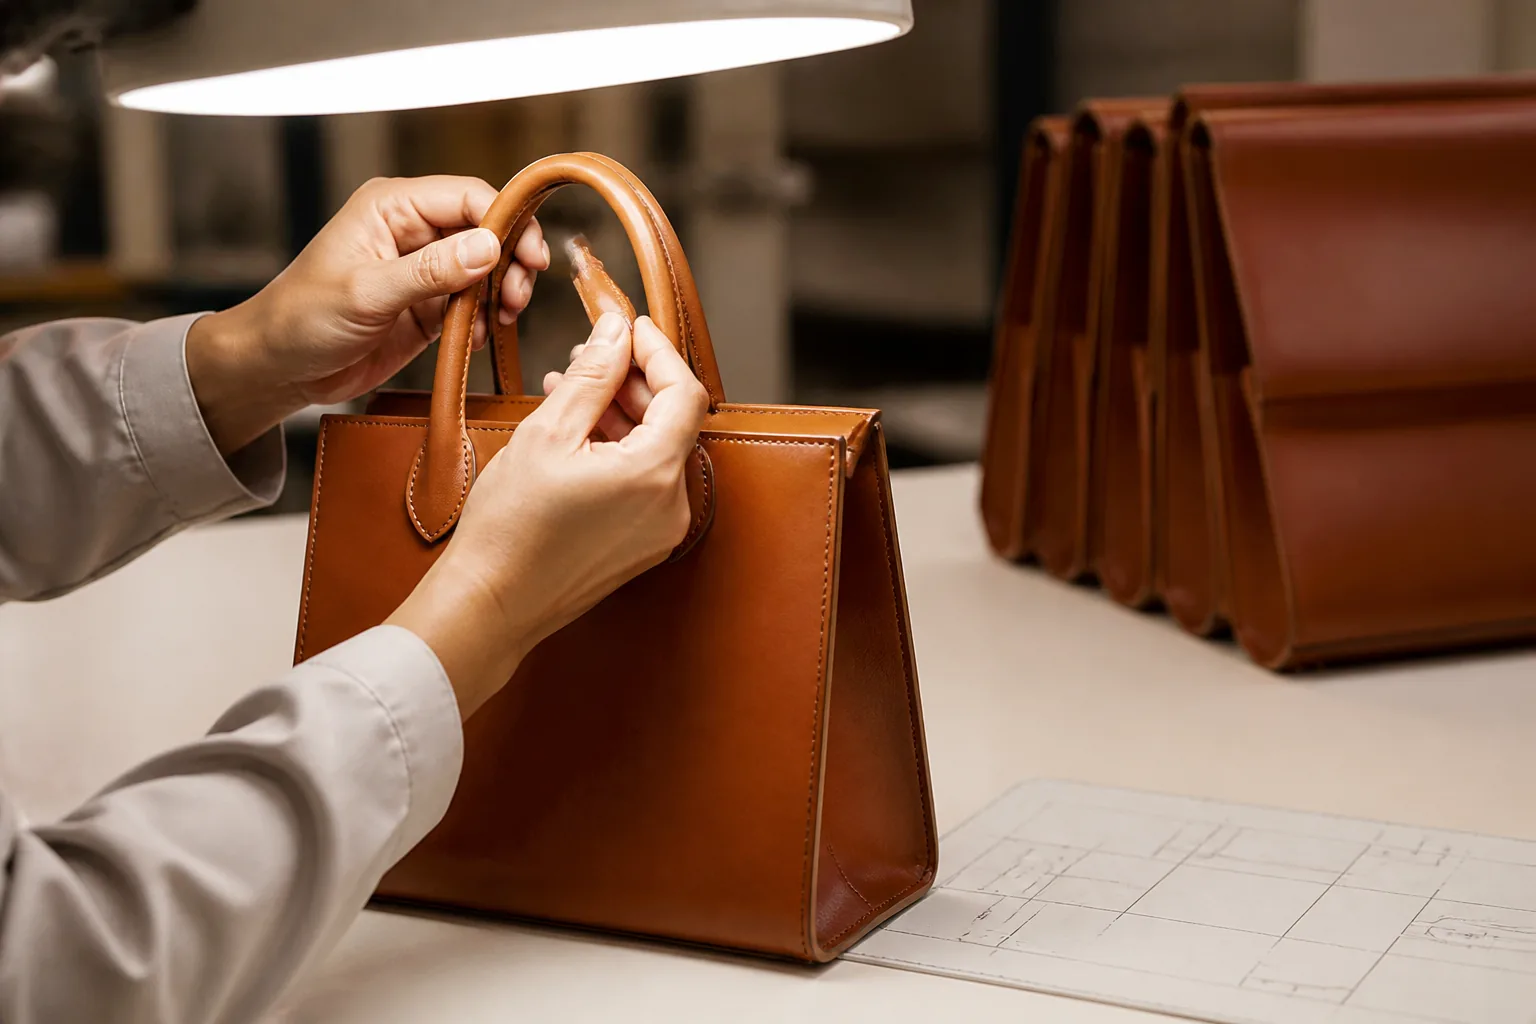
Quality control is not a final gate; it is a series of checks that run through every stage.
In-Line Checks
In-line checks catch errors while they are still cheap to fix, before the panel becomes part of a bag.
Cutting checks verify panel dimensions and shade matching. Sewing checks verify stitch density and seam alignment. Assembly checks verify hardware torque and alignment. A factory that only inspects finished bags is throwing away most of its prevention budget.
Final Inspection Table
Final inspection compares every finished bag against the approved sample and a written checklist.
| Check | What is verified | Failure action |
|---|---|---|
| Dimensions | Panel sizes and overall bag size within tolerance | Rework or reject |
| Stitching | Density, straightness, no skipped stitches | Rework seam |
| Edges | Uniform finish, no cracks or drips | Re-finish edge |
| Hardware | Function, alignment, finish consistency | Replace fitting |
| Lining | Alignment, no wrinkles, clean seams | Rework lining |
| Cleanliness | No marks, glue residue, or dust | Clean or reject |
Pull and Load Tests
Load testing simulates years of use in minutes, and it catches design weaknesses before customers do.
Handles are hung with a multiple of the bag’s intended load. Zippers are cycled repeatedly. Strap anchors are pulled at an angle, not just straight, because real use is never perfectly aligned. A bag that survives these tests with margin is a bag that will not generate returns.
Tolerances That Matter
Not every dimension needs to be perfect, and knowing which ones matter is part of manufacturing skill.
Bag width and height tolerances are forgiving; hardware spacing and strap length tolerances are not, because they affect function and appearance asymmetrically. Factories define critical and non-critical dimensions separately, and inspection focuses where deviation is actually visible or functional.
Packing, Protection and Shipping
Production is not finished until the bag arrives undamaged, and packing is a real manufacturing stage rather than an afterthought.
Protecting the Bag
Leather scratches, dents, and takes impressions from anything pressed against it, so protection is specific.
Bags are stuffed to hold shape, wrapped in acid-free tissue or soft cloth, and placed in a dust bag. Hardware is covered or taped to prevent contact marks during transit. Corners receive extra padding, because corner scuffing is the most common transit defect.
Cartons and Loading
Carton selection is a strength decision, not a size convenience.
Leather bags are heavy relative to their volume, so cartons must be rated for stacked weight, not just for a single box. Cartons are loaded to avoid deformation of the bottom layer, and inner dividers prevent bags from pressing against each other. Freight loading is planned so weight is distributed evenly across the pallet.
Documentation and Traceability
Shipping documentation links a physical bag to its production record, which matters when a question arises months later.
Production lots are tracked by order, batch, and date, so a problem can be traced back to a hide lot or a machine. Export documentation must match the buyer’s specifications exactly, because a mismatch at customs costs more time than any production delay.
Where Automation Helps and Where Skill Wins
Factories that automate the wrong steps lose quality, and factories that automate the right steps gain consistency and capacity.
Tasks Automation Improves
- Cutting standard panels with consistent registration
- Applying equal adhesive pressure through controlled fusing
- Skiving with repeatable taper angles
- Punching holes and setting standard fittings
- Recording inspection data and generating tolerance reports
These steps reward repeatability, and machines do repeatability better than people.
Tasks Where Human Skill Still Decides
- Nesting panels around defects to maximize yield
- Judging leather hand and shade across a production run
- Guiding soft leather through a sewing machine
- Burnishing edges to a uniform glass finish
- Making subjective calls on borderline defects
Automation cannot yet evaluate whether a hide mark is acceptable on a visible panel, or feel when leather is about to stretch. That judgment remains the most valuable skill on the floor, and it is why experienced factories are difficult to replace with equipment alone.
The Balance in Modern Production
The strongest factories combine both: machines for repeatability, craftspeople for judgment.
Cutting, fusing, and data capture are automated while nesting, stitching, edge finishing, and final inspection stay in skilled hands. This hybrid approach produces bags that are consistent from unit to unit while still retaining the material character buyers are paying for.
The Full Production Timeline
Production timing depends on material lead time, order size, and complexity, but the proportions are predictable.
How Long Each Stage Takes
| Stage | Typical duration | Deciding factor |
|---|---|---|
| Leather procurement | 1–4 weeks | Stock availability, tanning lead time |
| Pattern and prototyping | 1–3 weeks | Complexity, number of revisions |
| Cutting | 2–5 days | Order size, cutting method |
| Preparation and skiving | 2–4 days | Number of panels, reinforcement |
| Stitching | 4–10 days | Complexity, stitch density |
| Edge finishing | 3–8 days | Finish type, drying time |
| Assembly and hardware | 2–5 days | Fitting count |
| Quality control and packing | 2–4 days | Order size, inspection depth |
Where Delays Come From
Delays rarely come from the production floor itself; they come from decisions and materials upstream.
Late approvals on samples, leather arriving off-shade, hardware substitutions, and specification changes mid-production cause most schedule slips. The most reliable way to hit a delivery date is to freeze specifications early and verify materials before cutting begins.
What Buyers Should Ask a Factory
The right questions reveal more about a factory than any brochure or factory tour.
The Questions That Matter
- Which tanneries do you buy from, and can you show specifications?
- What is your standard stitch density, and where do you reinforce?
- How do you handle shade matching across a production run?
- What is your inspection process, and can we see a checklist?
- How do you test handles, straps, and zippers?
- What is your defect rate, and how are defects resolved?
- Can you produce a pre-production sample in the final materials?
- What are your tolerances for critical dimensions?
Red Flags in Factory Answers
Certain answers signal risk, and they are usually detectable in the first conversation.
Vague answers about tannery sources, refusal to provide a specification sheet, no inspection documentation, and quoted prices far below material cost are all warnings. A factory that cannot explain its process cannot control it.
Certifications and Audits
Certifications matter, but what they certify matters more.
Social compliance audits address labor conditions, while quality certifications address process control. Neither replaces a pre-production sample. Buyers should ask which specific certification, issued by whom, covering what scope — and treat vague claims as marketing rather than assurance.
Cost Breakdown of Making a Leather Bag
Understanding cost structure helps buyers evaluate quotes realistically and avoid quality traps.
Material Share
Leather typically dominates material cost, followed by hardware, lining, and packaging.
The leather share is why hide grade, thickness, and yield decisions drive price more than labor. A buyer asking for a lower price is usually, whether they intend it or not, asking for a lower-grade leather or a tighter yield.
Labor Share
Labor rises with stitch density, edge finish quality, panel count, and hardware fitting count.
A burnished vegetable-tanned bag with hand-set rivets can carry several times the labor of a painted chrome-tanned bag with simple construction. The difference is visible and durable, and it is legitimately reflected in price.
Overhead and Margin
Overhead includes equipment, rent, compliance, supervision, and quality systems; margin funds the factory’s continuity.
Quotes that omit overhead are not cheaper — they are short-term. Factories that survive and improve invest in these areas, and buyers who treat all overhead as waste eventually lose their best suppliers.
Why Cheap Quotes Are Cheap
A quote far below the market usually means a substituted material, a skipped process, or a hidden cost later.
Common substitutions include a lower leather grade, thinner panels, cheaper thread, plastic hardware in place of metal, and reduced inspection. Each saves money at the point of purchase and costs far more in returns, refunds, and reputation.
Frequently Asked Questions
How long does it take to manufacture a leather bag?
From approved sample to finished goods, typical production runs take four to eight weeks depending on order size and complexity. Leather procurement adds one to four weeks before production if material is not in stock. Custom hardware and complex edge finishing extend both timelines.
What is skiving in bag manufacturing?
Skiving is thinning leather along an edge or seam so folds and joints stay flat. Without skiving, folded edges become bulky and seams create ridges. It is done on a skiving machine and requires skill, because an uneven taper leaves a stepped or weak edge.
Why is yield important in leather bag production?
Yield is the percentage of a hide that becomes usable panels. Because hides are irregular and have defects, yield determines real material cost per bag. Improving yield from 70 to 85 percent can reduce material cost substantially without changing the leather’s quality.
How many stitches per inch should a quality leather bag have?
Most quality production runs six to eight stitches per inch, with higher density on stress points such as handle roots. Density matters less than consistency: even, correctly tensioned stitches throughout the bag indicate good machine control and proper thread choice.
What is the difference between painted and burnished edges?
Painted edges use layered edge paint to seal and smooth the edge, and they suit chrome-tanned and coated leathers. Burnished edges use friction, moisture and wax on denser vegetable-tanned leather, producing a glassy finish that ages with the bag. Burnishing requires more labor and skill.
Why do handles pull out of some bags?
Handle failure is usually a design or reinforcement problem rather than a stitching problem. Load concentrates at the anchor point, and if the leather there is not reinforced or doubled, the load tears through the material. Proper construction spreads the load across a wider area and adds a reinforcement layer.
What does a pre-production sample include?
A pre-production sample is built in the final materials, with final hardware, linings and edge finish. It becomes the reference for production, defining stitch density, dimensions, color, and finish. Buyers should keep an approved sample so quality disputes have an objective standard.
How do factories match leather color across a production run?
Factories select hides from the same tannery lot where possible, group panels by shade before cutting, and mix panels across each bag rather than grouping light and dark panels in separate bags. Shade variation is inherent in natural leather, and tolerance should be agreed with the buyer in advance.
What is the most common cause of leather bag returns?
The most common causes are shade mismatch against the product photo, edge finish cracking, hardware failure or tarnishing, and handle or strap failures. Each traces back to a specification or inspection gap rather than to a single worker’s mistake.
Do leather bags need to be lined?
Linings are not strictly required, but they improve interior appearance, protect the leather’s flesh side, and add structure. Unlined bags are common in heritage styles and can be very durable, though the interior will show leather fibers and wearable marks over time.
How can a buyer verify a factory’s quality before ordering?
Ask for a pre-production sample in final materials, request the inspection checklist, ask which tanneries supply the leather, and review previous production for the same construction type. A factory that documents its process will answer all four comfortably.
The Bottom Line
A leather bag is the visible result of a long, unglamorous sequence: hide selection, pattern engineering, cutting discipline, skiving precision, controlled stitching, careful edge finishing, engineered hardware attachment, and layered inspection.
Every stage offers a place to save money, and every stage offers a place to lose quality. The bags that last are not the ones where one step was exceptional — they are the ones where no step was skipped.
For buyers, the practical takeaway is to ask about process rather than appearance. A factory that can explain its yield, its stitch density, its reinforcement logic, and its inspection checkpoints is a factory whose bags will behave the way they look.
