
How Is a Leather Bag Turned Inside Out During Assembly?
How Is a Leather Bag Turned Inside Out During Assembly?
Almost every soft leather bag is sewn inside out. The panels are joined with the good side facing inward, the lining is attached, and then the whole assembly is pulled through an opening until the bag appears the right way round. It looks like a trick and it is treated like one, but it is the operation that decides how the finished bag sits, creases and holds its shape.
The turn is unforgiving because nothing can be corrected afterwards without leaving a mark. A seam allowance trimmed too little becomes a ridge along the edge of the bag. A corner turned too fast stretches the leather permanently. An opening cut too small makes the bag impossible to invert without distorting it, and the distortion is what the customer will see.
This guide covers the operation from the factory floor: how the construction is planned around the turn, what happens to leather when it is folded through an opening, how allowances and corners are managed, where topstitching belongs, and what damage appears only after the bag has been inverted. Seam allowance calculation and lining selection are covered elsewhere; here the question is what happens to them at the moment of turning.
- Why Bags Are Turned at All
- The Opening Decides Everything
- Planning the Construction Around the Turn
- The Turn Itself
- How Leather Behaves When It Is Folded
- Managing Seam Allowance Through the Turn
- Corners, Curves and Gussets
- Linings and the Bag Inside the Bag
- Opening Treatment After Turning
- Damage That Appears Only After Turning
- Tools That Help
- Timing and Labour
- Common Failures
- Checks After the Turn
- Design Decisions That Ease the Turn
- Turning Different Bag Types
- What the Turn Tells You About the Pattern
- Training the Operation
- Costing the Turn
- Working With the Factory on This Step
- A Defect Map for the Turn
- Working With Stiff and Soft Leathers
- When the Bag Cannot Be Turned
- The First Prototype Turn
- Hand Finishing After the Turn
- Frequently Asked Questions
- Conclusion
Why Bags Are Turned at All
Two Ways to Build a Bag
A bag can be built inside out and inverted, or built right side out with the seams finished as they are made. The first hides the construction and produces a clean exterior. The second exposes the seams and is used where the seam is part of the design, as in some unlined totes and work bags.
What Turning Buys
Turning gives a bag with no visible stitching on its outer seams, a soft edge where the leather folds over itself, and a lining that sits inside without a raw join. It also allows the base and the body to be joined invisibly, which is why most soft bags are built this way.
What Turning Costs
The cost is paid in three currencies: a hole that must later be closed, a set of allowances that must be trimmed before the bag can pass through itself, and a set of stresses on the leather at the corners. Each of these constrains the design before a single panel is cut.
The Opening Decides Everything
Where the Opening Goes
The opening is usually the top of the bag, closed afterwards by a zipper, a facing and topstitch, or a folded edge. Where a design allows, the opening sits at the widest part of the bag so that the largest section passes through it rather than being forced.
How Big It Must Be
The practical rule is that the opening must be larger than the widest cross-section of the bag, not merely larger than its mouth. A bag that is wider at the base than at the top will need either a wider opening, a separate base panel added afterwards, or a softer construction.
Facings and the Turned Edge
A facing is the strip that turns inside the opening and gives it a finished edge. Its width determines how much the opening can be worked during the turn, and its stiffness determines whether the rim stays crisp or softens in the hand.
Planning the Construction Around the Turn
Order of Operations
The sequence is fixed by physics rather than preference: everything that must be sewn from the inside is sewn before the turn, and everything that must be sewn from the outside is sewn after. Planning that sequence at the pattern stage prevents most of the problems that appear at the bench.
What Must Wait Until After
Topstitching along the opening, edge painting, hardware that would be crushed, and any closure that must align with the finished rim all come after the bag is right side out. Anything fitted earlier is either damaged by the turn or blocks it.
What Cannot Be Added Later
Rivets and studs that pass through several layers, reinforcement boards, and internal pockets that are sewn into the seam all have to go in beforehand. Discovering a missing reinforcement after the turn means opening a finished bag, which is the most expensive repair in the workshop.
| Stage | Done before turning | Done after turning | Risk if the order is wrong |
|---|---|---|---|
| Panels | Join all outer seams | Nothing | Visible raw seams |
| Lining | Attach and leave a gap | Close the gap | Impossible to close cleanly |
| Allowances | Trim and skive | Nothing | Ridges along every edge |
| Reinforcement | Insert into seams | Nothing | Shape loss within weeks |
| Topstitch | Nothing | Stitch opening and edges | Stitch hidden or distorted |
| Hardware | Only what survives pressure | Set after the turn | Crushed or scratched parts |
| Edge finish | Nothing | Paint or burnish | Finish cracked by folding |
Reading the Sequence
The table is not a suggestion. Every row in the right-hand column is a defect that appears on finished goods and is attributed, wrongly, to the material or the operator.
The Turn Itself
Hands and Pressure
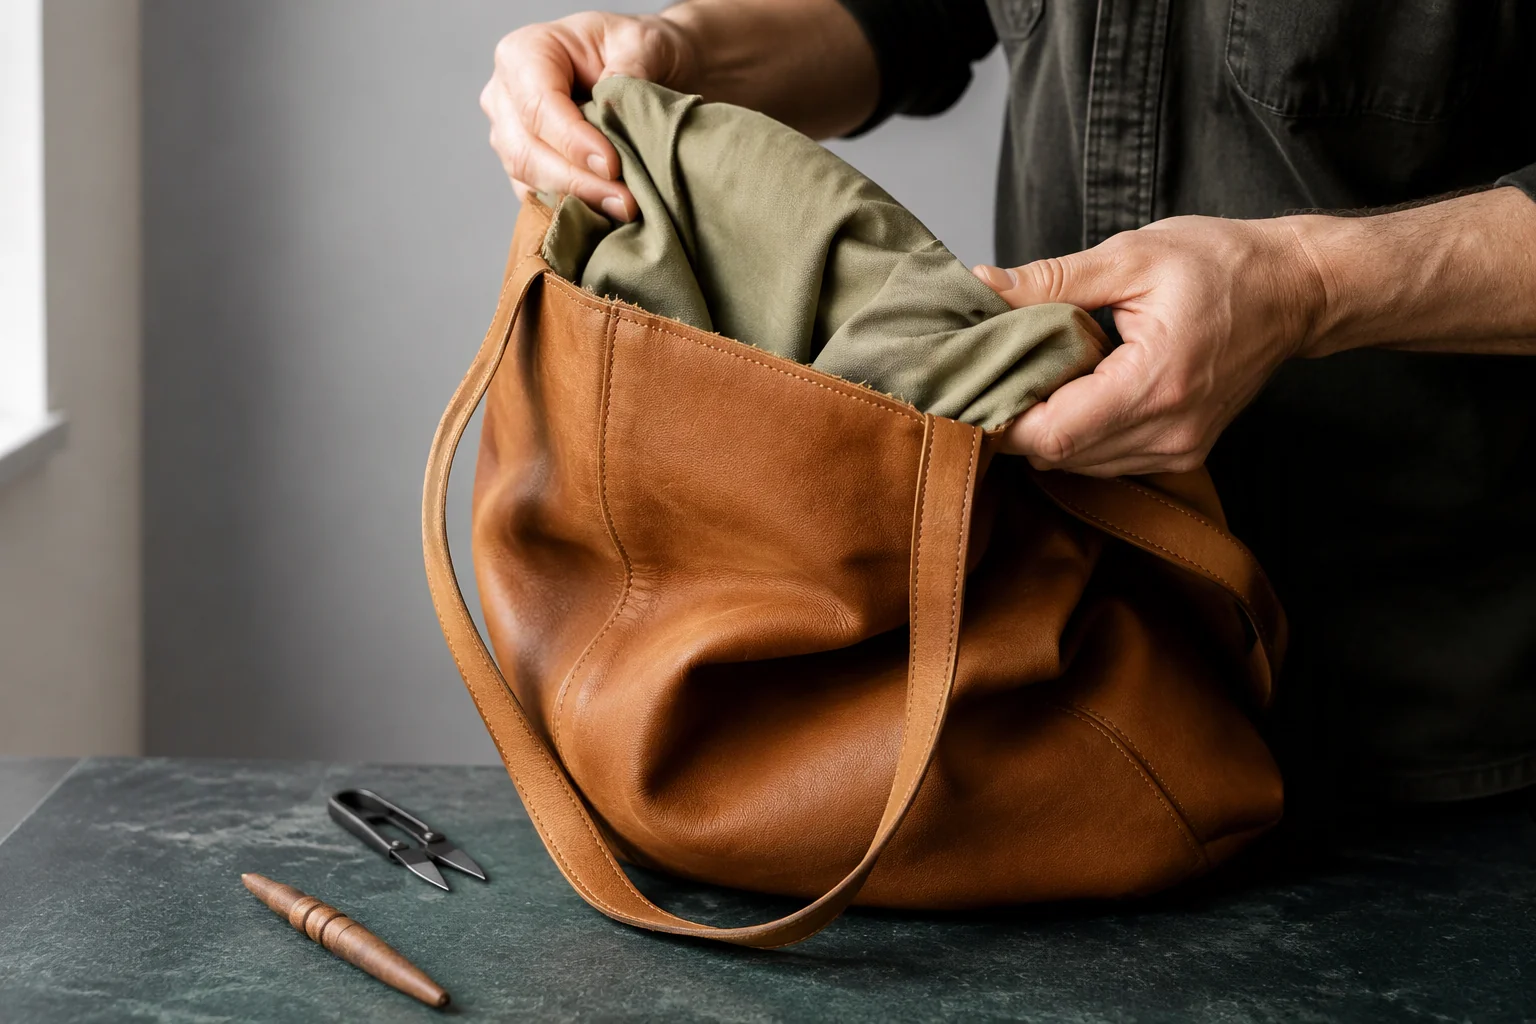
The bag is turned by working it through gradually, rolling the fabric of the bag over itself rather than pulling it through in one movement. Pulling concentrates force at the smallest opening and is the main cause of stretched seams.
Working the Corners
Corners are turned last and one at a time, with the leather supported from inside as it passes. A corner that is pulled hard will thin at the point, and a thinned corner shows as a pale mark that no amount of finishing will hide.
The Moment Leather Starts to Crease
Leather creases when it is folded tighter than its temper allows. The early signs are a dull sheen along the fold and a fine line that does not spring back when released. Stopping at that moment and widening the opening, or softening the fold, is cheaper than any later correction.
How Leather Behaves When It Is Folded
Grain and Direction
Leather folds more easily along one axis than another, following the direction of the hide’s stretch. A bag whose opening runs across the less flexible direction will resist the turn, and the resistance shows as a wavy rim.
Thickness and Resistance
Thickness matters less than the combination of thickness and temper. A firm 1.4 mm leather can be harder to turn through a narrow opening than a soft 1.8 mm one, because resistance comes from the fibre structure rather than the calliper alone.
What Happens at the Fold Line
The fold line is where the leather takes its permanent set. If it is folded once, cleanly, the line stays sharp. If it is worked back and forth during the turn, the line becomes soft and the bag loses the crisp rim the sample showed.
Managing Seam Allowance Through the Turn
Trimming Before Turning
Allowances are trimmed after sewing and before turning, to a width the construction can hide. Trimming too little leaves bulk that cannot pass through the opening; trimming too much risks the seam opening under load. The safe width is set by the seam type, not by convenience.
Notching and Skiving
Curved seams are notched so the allowance can spread around the curve without folding over itself. Where the leather is thick, the allowance is skived thinner before sewing so that the turned edge lies flat rather than forming a step.
When Bulk Becomes a Lump
Bulk at a corner or a strap joint becomes a visible lump on the finished bag. The remedy is to plan the joint so that the bulky allowances sit in different places rather than stacking, which is a design decision made at the pattern stage.
Corners, Curves and Gussets
Square Corners
A square corner needs its allowance trimmed diagonally across the point and its tip supported during the turn. A corner turned without that support rounds off, and a rounded corner on a bag designed with square ones is a visible error at a metre’s distance.
Curved Ends
Curves need more notching and slower turning. Where a curve is tight relative to the leather’s thickness, the allowance is reduced and the seam reinforced, because a tight curve concentrates load on a short length of stitch.
Gusset Depth
A deep gusset makes the bag wider at the base than at the opening, which is the geometry most likely to resist the turn. Either the opening is extended into the gusset, or the base is added as a separate panel after the body is inverted.
Linings and the Bag Inside the Bag
The Bag-within-a-Bag Method
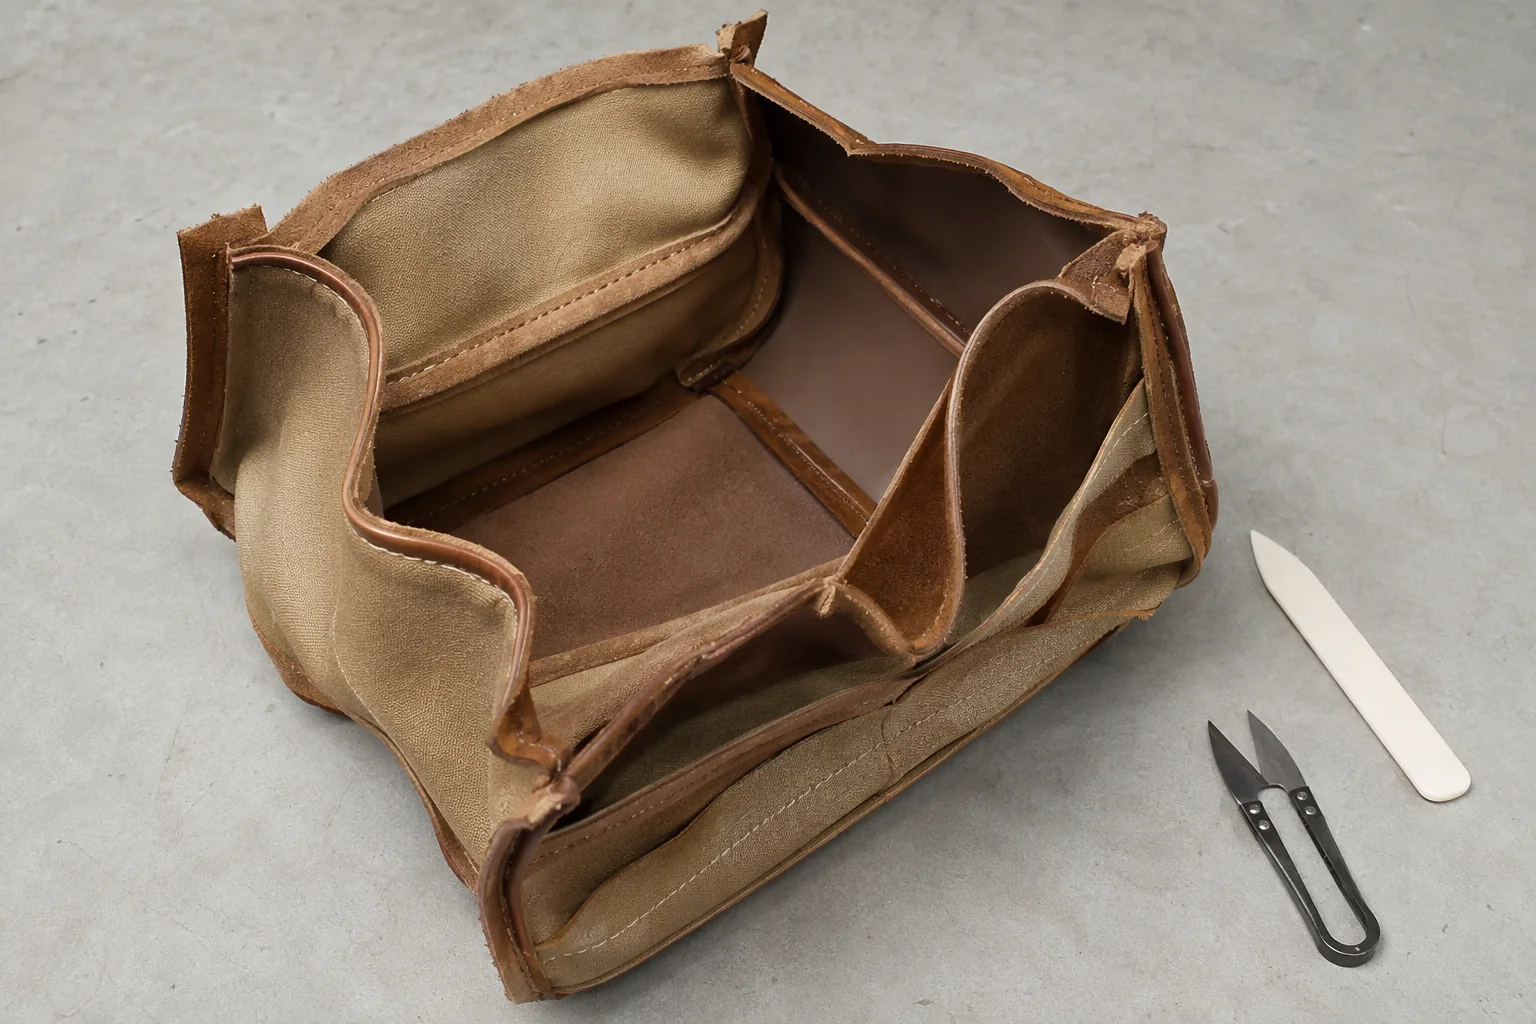
Most lined bags are made as two bags: the outer shell and the lining, sewn separately and joined at the opening. The pair is then turned as a single unit through a gap left in the lining, which hides the join and protects the outer leather during the turn.
Leaving the Lining Gap
The gap is sized to the hand that will close it and positioned where it will be least visible and easiest to reach. A gap that is too small forces the turn through a narrow opening; one in the wrong place is difficult to close invisibly.
Closing the Gap Cleanly
The gap is closed by machine where it can be reached and by hand where it cannot. Hand closing is slower and, done well, invisible; done badly it is the first thing a customer finds when looking inside a new bag.
Opening Treatment After Turning
Topstitch After Turning
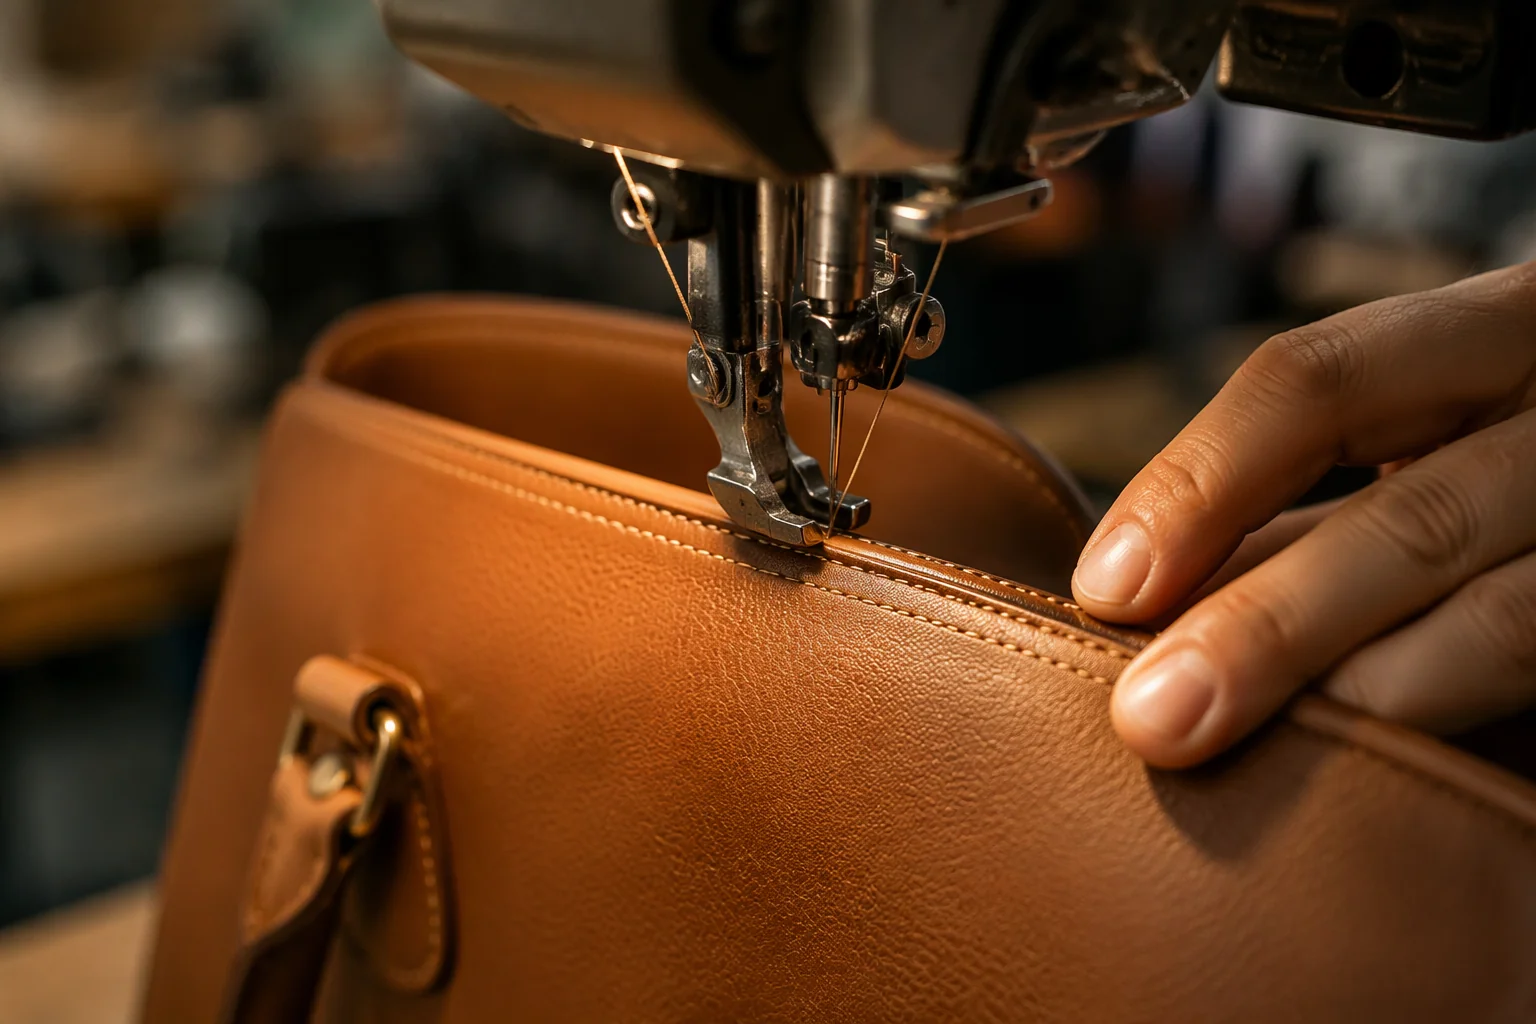
Topstitching after the turn is what fixes the rim and gives the bag its line. It is sewn at a consistent distance from the edge, through the facing and the outer leather, and it is the stitch most likely to wander when the bag is not held flat.
Edge Paint Timing
Edge paint goes on after turning, because folding the edge after painting cracks the finish. Where an edge must be painted before assembly, the fold is planned away from the painted section.
Framing and Zippers
Metal frames and zippers that run around the opening are fitted after the turn, because they cannot pass through it. Their alignment is set against the finished rim, which is why a frame fitted before turning will never sit square.
Damage That Appears Only After Turning
Creases That Will Not Come Out
A crease set during a rushed turn becomes permanent within hours. Steam and light heat can relax a fresh crease; a crease that has been sitting in a carton for a week usually cannot be removed without leaving a mark.
Stretched Seams
Pulling a bag through a small opening stretches the seam that passes through it. The stitch does not break; it opens slightly, and the seam becomes a line of small gaps that shows when the bag is loaded.
Plating Marks
Hardware fitted before the turn is rubbed against the bench and against the bag’s own panels. Plated parts show the damage as a dull patch that cannot be polished back, and the part must be replaced.
Tools That Help
Turning Sticks and Forms
A smooth wooden or bone tool lets the operator push out corners without pulling. A form cut to the bag’s internal shape holds the body while the corners are worked, which prevents the distortion that hand pressure causes.
Steam and Heat
Light steam relaxes the fibre enough to let a stubborn fold settle. Heat is used sparingly and at a distance, because leather that is warmed too much loses the finish it was given at the tannery.
The Bench Setup
The turn needs space, light and a clean surface. A bench crowded with the previous operation’s tools is where bags get marked, and the mark is always found after the bag is closed.
Timing and Labour
Minutes per Bag
A simple tote turns in under a minute in experienced hands. A structured bag with a deep gusset, a frame and a lining gap can take ten, and the difference is invisible in a costing sheet that averages across styles.
Where the Time Goes
Most of the time is spent on corners and on the lining gap, not on the body. A line that plans labour per bag without separating those two elements will consistently misprice structured styles.
Why This Operation Sets the Line Rate
Because it is the point where all the previous operations converge and cannot be parallelised much further. A bottleneck at the turn delays finishing, packing and dispatch in that order, and it is the operation most often blamed on the wrong cause.
Common Failures
Opening Too Small
The single most common design error, and the one that produces the widest range of symptoms: stretched seams, wavy rims, distorted gussets and a general softness that is attributed to the leather.
Corners Turned Too Fast
Speed at the corners produces thinned points and rounded corners. The error is invisible on the bench and obvious on the shelf, which is why it survives inspection.
Nothing Tested Before the Run
A prototype that is turned once before production reveals almost every problem in this article. Skipping that step is the reason those problems appear a thousand times instead of once.
Checks After the Turn
The following checks belong at the bench, immediately after the bag is inverted, while the leather is still able to be corrected.
- Rim line is straight and the facing is even on both sides
- Corners are sharp or round as specified, with no thinning
- No crease lines across a panel face
- Seams show no gaps when the bag is gently loaded
- Hardware is free of marks and correctly oriented
- Lining sits without pulling and the gap is closed invisibly
Design Decisions That Ease the Turn
Panel Count
Fewer panels mean fewer seams to pass through the opening and fewer allowances to manage. Where a design needs many panels for shape, the opening usually needs to grow with them.
Allowance Discipline
One allowance width across the whole bag is easier to trim, easier to skive and easier to hide. Mixed allowances are a common source of ridges on one edge and thin seams on another.
Hardware Placement
Hardware near the opening interferes with the turn and is vulnerable during it. Moving a D-ring ten millimetres down the side seam can remove a recurring damage point entirely.
Turning Different Bag Types
Totes and Open Bags
A tote has a generous opening and few curves, which makes it the easiest bag to turn. Its difficulty is the rim: a wide opening must still hold a straight topstitch line, and the facing has to be stiff enough not to sag between the handles.
Structured Bags and Frames
A body reinforced with board cannot be turned in the usual way, because the board does not bend. These bags are built right side out with the seams bound or turned and stitched, or the reinforcement is inserted through a separate opening after the body is inverted.
Backpacks and Curved Panels
A backpack combines a narrow opening with a rounded body, which is the least forgiving geometry in the workshop. The turn is usually done through the base, closed afterwards with a base panel, and the order of assembly is planned backwards from that step.
Small Goods
Wallets and pouches turn through an opening that is proportionally large, so the operation is quick. The risk shifts to the corners and to the lining gap, which in a small item is only a few centimetres and easy to close badly.
What the Turn Tells You About the Pattern
A Diagnostic Step
The first turn of a new pattern is a test of the pattern, not of the operator. If the bag will not invert cleanly, the pattern needs changing, and the change is cheaper now than in the thousandth unit.
Adjustments Worth Making
Widening the opening by ten millimetres, moving a seam, reducing an allowance or splitting a panel are all small changes. Each one is a pattern revision, and each one removes a class of defect permanently.
Recording the Lesson
A note on the pattern file saying that the opening was widened for turning saves the next person from repeating the experiment. Factories that keep such notes turn new styles faster than factories that rely on memory.
Training the Operation
The Apprenticeship Reality
Turning is learned by watching and correcting, over months. The skill is in the hands: how much pressure, where to support, when to stop. No document transfers it, which is why the operation is concentrated in a few people.
What Can Be Taught Explicitly
The sequence, the tools, the checks and the stopping rules can all be written and taught. What cannot be taught in a document is the feel, and the feel only develops where the stopping rules are enforced by someone who has it.
Spreading the Skill
Where only one person can turn a style, the line stops when that person is absent. Deliberately rotating two or three people through the operation costs a little speed in the short term and removes a single point of failure.
Costing the Turn
Labour Minutes
Costing the turn as an average across styles is the most common error in bag costing. Structured styles can take ten times the labour of a simple tote at this operation alone.
Rework and Second Turns
A bag turned badly may need to be turned back, corrected and turned again, which doubles the labour and risks a permanent crease. Rework at this operation is expensive out of proportion to its frequency.
The Hidden Cost of Tight Openings
A design that saves five centimetres of opening to gain a cleaner line may add a minute of labour and a percentage point of defects to every bag. That trade is rarely calculated, and it is the kind of decision that a factory should raise at the sampling stage rather than absorb silently.
Working With the Factory on This Step
What to Ask at Sampling
Ask how the bag will be turned, where the opening is, whether the pattern has been tested by turning a prototype, and what the factory expects the operation to take. The answers reveal whether the construction has been thought through.
What to Look For in a Sample
Turn the sample inside out if the design allows, and look at the allowance width, the corner treatment and the lining gap. A sample that cannot be turned back is often a sample whose interior was never meant to be seen.
Writing It Into the Specification
A specification that names the turn direction, the opening treatment and the interior finish removes the guesswork. It also gives the factory a defensible position when a brand later asks for a construction that cannot be inverted.
A Defect Map for the Turn
Reading Symptoms Backwards
Most turning defects are recognised by their symptom long after the cause has passed. The table below reverses that, so that a fault seen on the bench points to the decision that produced it.
| Symptom | Likely cause | Prevention |
|---|---|---|
| Wavy rim | Allowance not trimmed or notched | Trim to one width before turning |
| Thinned corner | Corner pulled rather than supported | Support from inside, turn last |
| Crease across a panel | Opening too small for the section | Size the opening to the widest part |
| Seam gaps under load | Seam stretched during the turn | Roll the bag, never pull it |
| Rounded corners | Tip not supported at the point | Use a form or a turning stick |
| Dull hardware patches | Parts fitted before the turn | Set hardware after inversion |
| Lining pulls at the top | Gap closed under tension | Close the gap with the bag relaxed |
| Ridge along the gusset | Stacked allowances at one joint | Stagger allowances between seams |
Using the Map at the Bench
Where a fault recurs across a run, the fix belongs in the pattern rather than in the operation. Repeating the same correction on every bag is a signal that a design decision is being absorbed by labour.
Working With Stiff and Soft Leathers
Stiff Temper
Firm leather holds a rim beautifully and resists the turn. Openings must be generous, corners must be supported, and the fold line must be set once rather than worked. Steam helps, but over-softening a firm leather to force a turn defeats the reason it was chosen.
Soft Temper
Soft leather turns easily and shows every mark from the bench. The risk shifts from distortion to damage: a fingernail, a tool left on the surface, a rough edge on the form. Clean hands and a clean bench are the actual controls here.
Coated and Finished Surfaces
A coated or embossed surface creases visibly and cannot be refinished locally. Where such leather is used, the fold is planned onto a seam or a panel edge so that any crease sits where the design already has a line.
When the Bag Cannot Be Turned
Rigid Structures
A bag with board in the body, a metal frame running the full perimeter, or a moulded base cannot be inverted. Attempting it produces a permanently deformed bag rather than a slow operation.
Alternative Constructions
Those bags are built right side out. Seams are bound with a strip, turned and stitched as a flat fell, or hidden behind a facing. Each approach costs more labour and produces a different interior, which is a design decision rather than a compromise.
The Cost of Forcing It
Forcing a rigid bag through an opening is the single most expensive mistake in this operation: it destroys the panels, the frame and often the hardware, and none of it can be reused.
A construction that cannot be turned is not a manufacturing problem. It is a construction that was specified without asking how it would be made.
The First Prototype Turn
Before a production run, the prototype should be turned once and examined as a test rather than as a sample. The list below is what to record at that moment.
- Whether the bag inverted without force
- The opening width that was needed
- Any allowance that had to be trimmed further
- Where the leather creased and whether it relaxed
- Whether the corners held their shape
- Time taken, and by whom
- What would be changed in the pattern
Why the Record Matters
The prototype turn is the only cheap opportunity to change the pattern. A note taken at that moment prevents the same problem being rediscovered on the thousandth bag, when the only options are rework or concession.
Hand Finishing After the Turn
Burnishing the Rim
An unpainted rim is burnished after turning, which compresses the edge and darkens it slightly. The result is a soft, durable edge that shows handling well, and it depends on the fold being clean before the burnishing begins.
Hand Stitching the Gap
The lining gap is closed by hand with a saddle stitch in most quality bags, because a machine cannot reach it without distorting the rim. The stitch is small, even, and matched to the existing thread, and it is the detail an experienced buyer checks first.
Final Press
A light press after turning settles the rim and removes the handling marks of the operation. It is done with a cloth barrier and low heat, because direct heat on finished leather leaves a sheen that cannot be removed.
Frequently Asked Questions
Why are leather bags sewn inside out?
Sewing inside out hides the seams and allows the bag to be turned so that the exterior has no visible join. The lining is usually attached in the same operation, and the whole assembly is inverted through an opening left for that purpose.
How large should the turning opening be?
It must be larger than the widest cross-section of the bag, not just its mouth. Where a bag is wider at the base, either the opening is extended into the gusset or the base is added as a separate panel afterwards.
Can a bag be turned more than once?
It can, but each turn stresses the leather and the seams. A second turn is sometimes necessary for correction, and it risks a permanent crease along the rim, so it is treated as rework rather than routine.
What causes a wavy rim after turning?
Usually a seam allowance that was not trimmed or notched enough, combined with an opening that was slightly too small. The leather is forced to compress along the fold, and it recovers unevenly.
Does thicker leather make turning harder?
Not by itself. Resistance comes from temper and fibre structure as much as from thickness, so a firm 1.4 mm leather can be harder to turn than a soft 1.8 mm one.
When should topstitching be done?
After the bag is turned. Topstitching before the turn would be hidden inside, and it would also be distorted by the fold. The stitch fixes the rim and gives the bag its final line.
Why do some bags have a gap in the lining?
The gap is the opening through which the bag is turned. It is closed by machine where reachable and by hand where not, and its position is chosen for access and invisibility.
What is the most common turning defect?
A stretched seam or a thinned corner, both caused by pulling the bag through an opening that is too small. The damage is permanent and cannot be corrected without replacing the panel.
Can reinforced bags be turned?
Only where the reinforcement is flexible. Rigid board prevents inversion, so those bags are built right side out with bound or turned-and-stitched seams, or the board is inserted through a separate opening afterwards.
How long does turning take?
Under a minute for a simple tote in experienced hands, up to ten minutes for a structured bag with a deep gusset, a frame and a lining gap. Averaging across styles misprices the operation badly.
What should a brand check in a sample after turning?
Rim straightness, corner sharpness, absence of crease lines, seam integrity under light load, and the state of the hardware. These are the five things that cannot be corrected after the bag is closed.
Conclusion
Turning is the operation where a pattern stops being a drawing and becomes a physical object that either works or does not. Everything downstream inherits its result: the rim that will not stay straight, the corner that thinned, the seam that opens under load, the crease that appeared in a carton.
For a bag manufacturer, the discipline is simple to state and hard to keep. Test the turn on a prototype before the run, size the opening to the widest section rather than the mouth, trim and notch allowances deliberately, support the corners, and check the bag at the bench while the leather can still be corrected. None of that requires new equipment, and all of it shows up in the first impression a customer forms.
For a brand, the useful question at sampling is not whether the sample looks right, but whether the construction was designed for the operation that produces it. A factory that can explain how the bag will be turned, and what had to change in the pattern to make it possible, is a factory that has already found the defects the next order would otherwise carry.
