
Leather Hide Anatomy: Grading Areas for Bag Making
Leather Hide Anatomy: Grading Areas for Bag Making
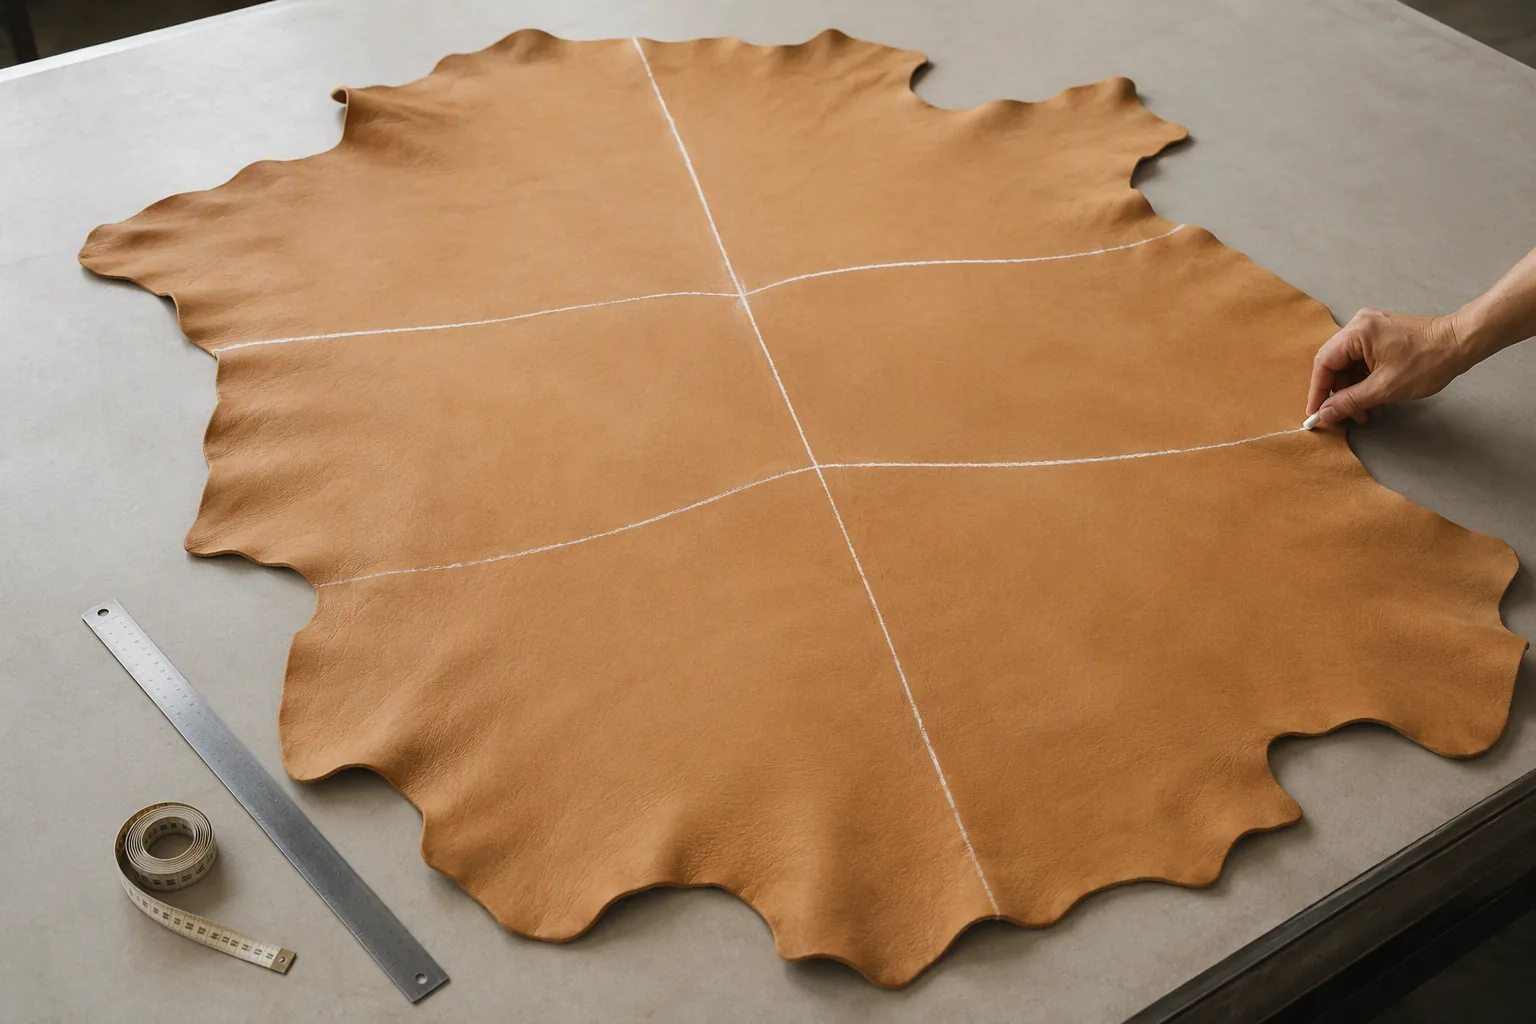
A hide is not a uniform sheet of material, and treating it as one is the fastest way to produce bags that look fine on the bench and tired after three months of use. The same hide contains dense, tight-grain material and loose, stretchy material, and the difference shows up in how a bag holds its shape.
As a bag manufacturer, we allocate hides by area rather than by square metres, because where a panel comes from decides whether it will stay flat and how it will age. This guide covers the main areas of a hide, how they differ, how area grading works, and how a cutting plan should use every part of the hide without putting the wrong material on the wrong panel.
A hide is a set of materials, not one material. The skill in bag making is not buying better hides — it is putting the right area on the right panel, and using the rest deliberately instead of by accident.
- Why Hide Anatomy Matters in Bag Making
- The Main Areas of a Hide
- How Areas Differ in Practice
- Area Grading Systems
- Cutting Plans That Respect Anatomy
- Designing With Area in Mind
- Area Allocation by Bag Type
- Incoming Inspection and Area Verification
- Common Area-Related Defects
- Working With Tanneries on Area Selection
- Reducing Waste Without Sacrificing Quality
- Cost and Planning Implications
- How Anatomy Interacts With Leather Type
- Common Misconceptions About Hides
- Frequently Asked Questions
- The Bottom Line
Why Hide Anatomy Matters in Bag Making
Anatomy decides performance before any specification is written.
One Hide, Several Materials
A single hide spans a wide range of behaviour.
The material over the spine is dense, tightly packed and dimensionally stable. Material toward the belly is thinner, looser and much more extensible, and material at the neck carries folds and grain irregularity that never disappear. These are not defects; they are the natural structure of the animal, and they must be matched to the parts of a bag that can accommodate them.
What Changes Across a Hide
The changes are physical rather than cosmetic.
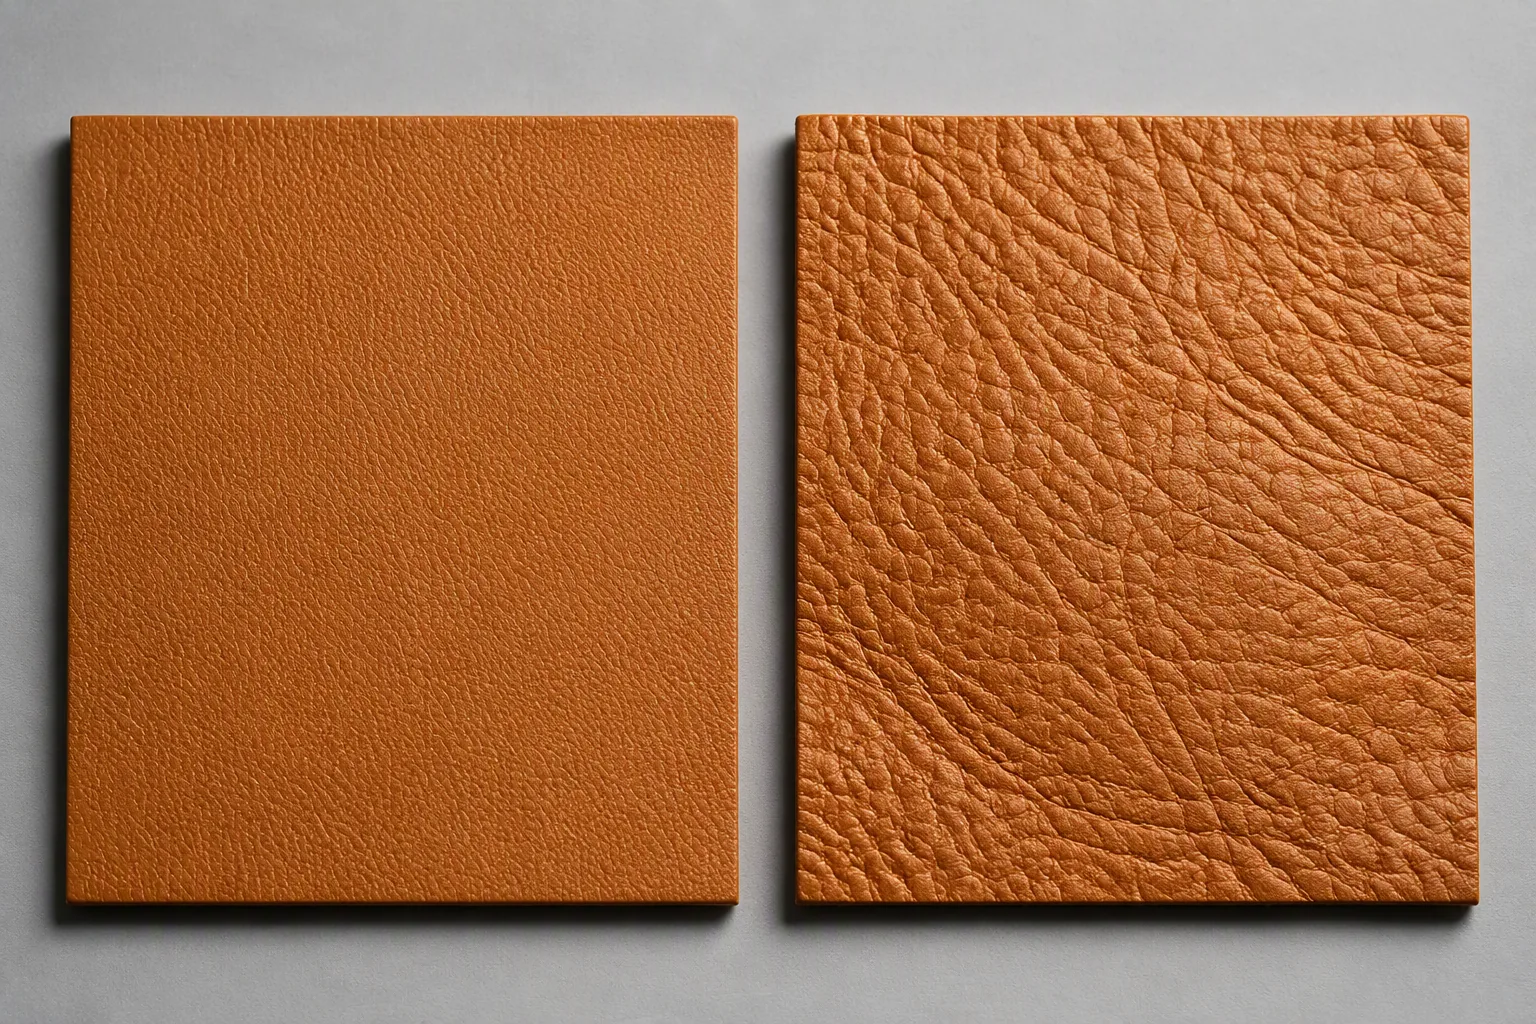
Fibre density, grain tightness, thickness and stretch all vary with position, and they vary together. A dense area is usually thicker, tighter-grained and more stable, while a loose area is thinner, more open-grained and more stretchy. Because these properties move as a set, a panel cut from the wrong area brings several weaknesses at once rather than just one.
Why Area Grading Is a Cost Decision
Area grading exists because the good areas are limited.
A hide contains a fixed proportion of dense, presentable material, and that proportion sets how many premium panels it can produce. If the front panel, flap and handle of a bag all require dense material, the yield of that hide is decided by the size of its back area rather than by its total surface. Understanding this converts an apparently simple material cost into a yield calculation.
The Main Areas of a Hide
Hides are usually discussed as a small number of recognisable regions.
Back and Butt
The back and butt contain the densest and most stable material on the hide.
Grain is tight, fibre structure is compact, thickness is at its highest and stretch is low and even. This is the material for panels that must stay flat, hold shape and survive abrasion: front panels, flaps, base panels, handles and straps. In most bag programmes, demand for this area is what drives leather purchasing.
Shoulder
The shoulder is strong but less uniform than the back.
It is dense and reasonably firm, with slightly more surface variation and a less even grain. It works well for medium-exposure panels such as body sides, gussets and larger secondary surfaces where a small amount of natural variation reads as character rather than as a fault.
Belly and Flank
The belly and flank are the most extensible areas of the hide.
Grain is open and often loose, thickness is lower, and the material stretches noticeably under load. Panels cut from here can look correct in the workshop and then bag out, ripple or stretch permanently once the bag is used. This material belongs on internal parts, pocketing, linings, gussets in soft constructions, and any panel that does not carry structure or bear load.
Neck, Head and Legs
The front of the hide carries folds, scars and irregular grain.
Neck material frequently shows deep grain folds that persist through finishing, and head and leg areas are small, irregular and difficult to nest efficiently. These areas suit internal components, small trims, reinforcement patches and pieces where the surface is not seen.
Shanks and Extremities
The outer edges of the hide have the least predictable behaviour.
Lower legs and shanks are thin, irregular and often have a different grain character altogether. They can be used for internal stiffeners, small internal tabs and filler pieces, but they should not be allocated to visible exterior panels.
Area Characteristics at a Glance
| Area | Grain and density | Stretch behaviour | Best use in bags |
|---|---|---|---|
| Back and butt | Tightest grain, densest fibre | Lowest and most even | Front panels, flaps, base, handles |
| Shoulder | Firm, slightly uneven grain | Low to moderate | Sides, gussets, secondary panels |
| Belly and flank | Open, loose grain | High, uneven | Internal parts, pocketing, linings |
| Neck | Folded, marked grain | Moderate | Trims, reinforcement, small parts |
| Head and legs | Irregular, small pieces | Variable | Filler pieces, internal stiffeners |
How Areas Differ in Practice
The differences matter because bags load leather in different ways.
Grain Tightness and Fibre Density
Grain tightness decides how a panel behaves at a seam.
Dense material holds stitches without tearing, keeps its surface flat at stress points and creases with a fine break when folded. Loose material pulls, puckers and shows visible stretch around a seam, and the effect worsens with load. This is why grain quality, not only thickness, is specified for structural panels.
Stretch and Recovery
Stretch is the property most likely to surprise a buyer.
Leather from the belly stretches substantially under tension and does not fully recover, which is why a bag with belly-area body panels tends to grow, sag and develop a baggy appearance. Back-area material stretches far less and returns closer to its original dimension, so it keeps the panel flat over time.
Thickness Variation
Thickness is not constant across a hide.
It is greatest over the spine and butt and reduces toward the belly and extremities. A cutting plan that assumes a uniform substance will produce panels that vary enough to matter in assembly, which is why good factories measure thickness at several points and shave or split where the specification requires it.
Colour and Finish Uniformity
Colour varies with area, which is why area and colour decisions are linked.
Dye absorption and finish levelling differ across the hide, so belly material usually shows more tone variation than back material. Panel matching groups therefore benefit twice from being cut from the back area of the same hide: they match in colour and they match in behaviour.
Property Comparison by Area
| Property | Back and butt | Shoulder | Belly and flank |
|---|---|---|---|
| Fibre density | Highest | High | Lowest |
| Grain tightness | Tightest | Medium | Open and loose |
| Thickness | Greatest | Medium to high | Lowest |
| Stretch under load | Very low | Low to medium | High |
| Recovery after stretch | Best | Good | Poor |
| Colour uniformity | Most even | Moderate | Least even |
Area Grading Systems
Grading describes usable material, and it is worth understanding what it does and does not mean.
What a Grade Means
A grade is a statement about the proportion and position of acceptable material.
It is not a quality verdict on the whole hide, and it is not a substitute for inspecting specific panels. Two hides of the same grade can serve two different projects, depending on where the good area sits relative to the shapes the pattern needs.
Common Grading Approaches
Different supply chains express grading differently.
Some tanneries grade by the percentage of the hide that is free from defects above a size threshold, others describe the position and size of the prime area, and some speak in terms of the yield a typical cutting plan can expect. All three describe the same underlying reality, which is how much of the hide can be used for visible panels.
Reading a Tannery Grade
The useful questions are practical rather than technical.
- Which area is considered prime, and how large is it in real terms?
- What defect size is tolerated within that area?
- What proportion of the hide is expected to reach a visible panel?
- How consistent is the grade across lots from the same article?
A supplier who can answer these questions is easier to work with than one quoting only a grade label.
Limits of Grading
Grading cannot decide panel allocation.
Two hides of identical grade will differ if the shape of the prime area differs, because a long panel and a wide panel consume a hide differently. Grading narrows the selection; the cutting plan makes the final decision, and it is where the yield is actually created.
Cutting Plans That Respect Anatomy
The cutting plan is where hide anatomy is either used or wasted.
Assigning Panels by Area
Panels should be assigned to areas by requirement, not by convenience.
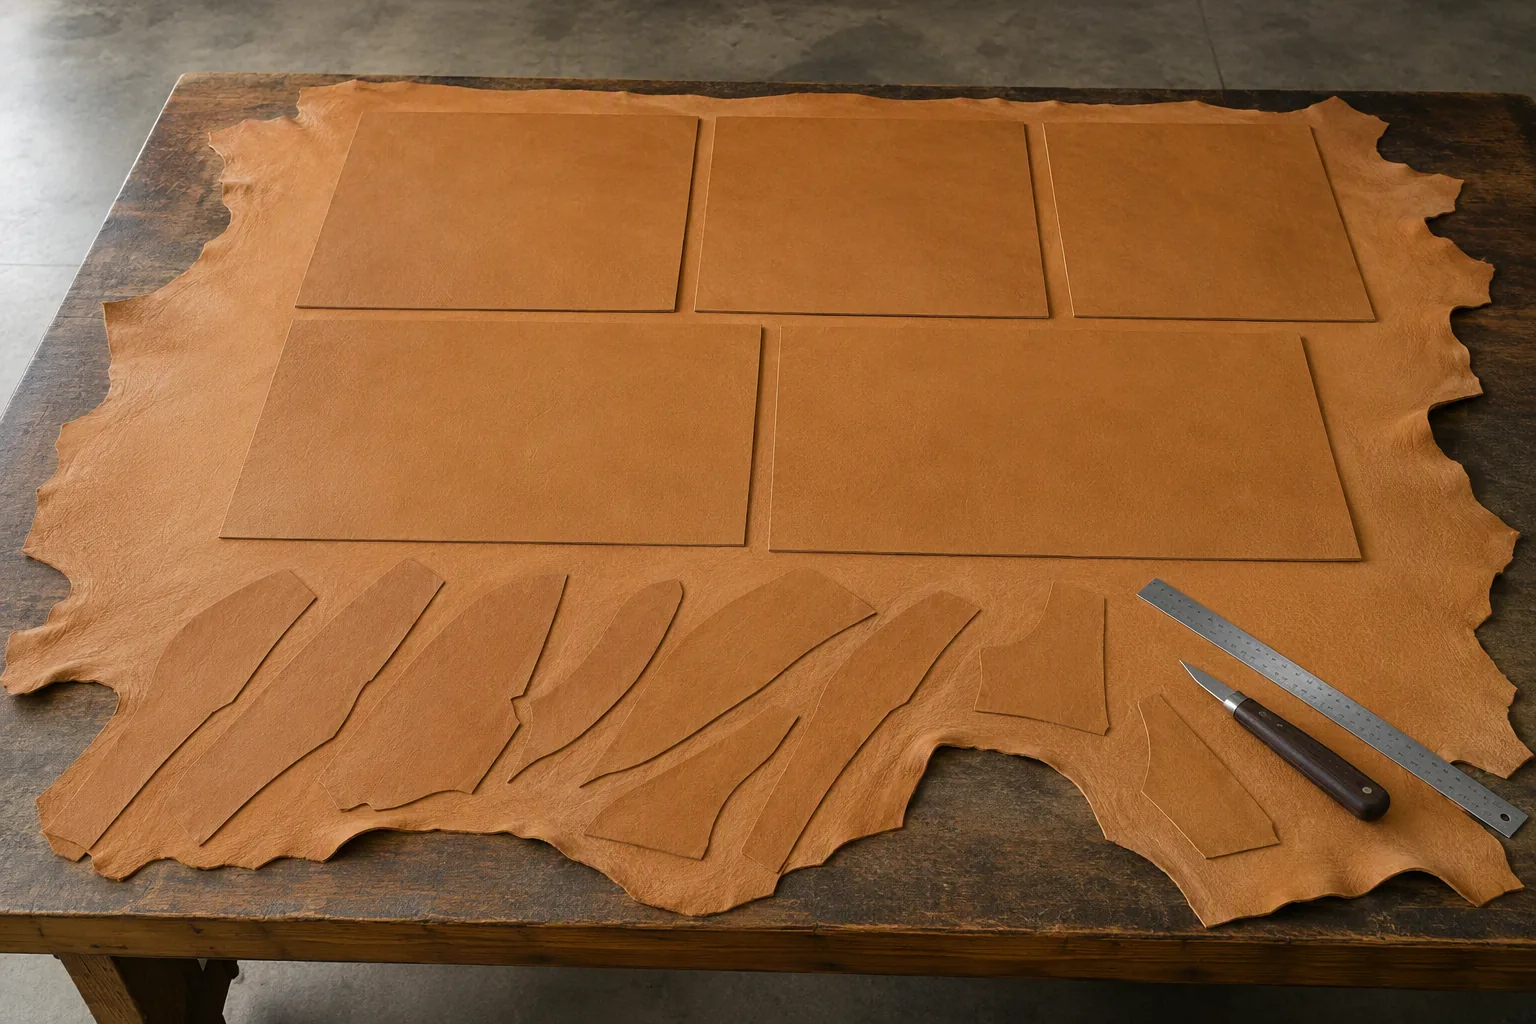
The practical sequence is to list the panels that must stay flat and hold shape, place them in the back and butt area, then allocate medium-demand panels to the shoulder, and finally fill internal parts from the belly, neck and extremities. Working in that order prevents the common failure where a large internal pocket is cut from prime material while a visible side panel comes from the belly.
Matching Groups and Area Overlap
Matching groups and area allocation must be planned together.
Panels that must match in colour usually also need to match in behaviour, so they should come from the same area as well as the same hide. Combining the two requirements is more material-efficient than treating them separately, because a single allocation decision satisfies both.
Yield Versus Quality Trade-Offs
Every hide forces a trade-off between using more of it and putting better material on visible panels.
Tightening the allocation rule raises the average quality of the finished goods and lowers the yield, while loosening it raises the yield and increases the risk of baggy or rippled panels in the field. The trade-off should be made deliberately, per product tier, and recorded so it is consistent across production runs.
Waste That Cannot Be Avoided
Some material will always go unused.
Extremities, heavily marked areas, holes and edge damage cannot be recovered, and the true yield of a hide is always lower than its surface area suggests. Estimating realistic yield at the development stage protects the cost calculation from an optimism that only appears in the workshop.
Designing With Area in Mind
Good bags are designed with hide anatomy in mind from the beginning.
Panels That Hide Looseness
Some panels absorb the character of looser material gracefully.
Panels that are small, gathered, pleated, tucked behind hardware or made of multiple pieces hide variation well. Darts, elasticating and shirring convert a loose material into controlled shape, which is one reason soft constructions can use more of a hide than structured ones.
Panels That Expose Looseness
Other panels advertise it.
A large flat panel with a straight visible top edge has nowhere to hide. Neither does a panel with a long uninterrupted seam, a base that must stay rigid, or a flap that must lie flat against another panel. These are the panels that must receive dense material, and identifying them early is the core of the design decision.
Where Structure Comes From
Structure can come from material or from construction.
Firm back-area leather provides structure directly, while soft material combined with reinforcement, piping, edge binding or a laminated stiffener can provide it indirectly. Choosing between them is a cost, weight and process decision, and it should be made in the tech pack rather than discovered on the line.
Reinforcement as a Substitute
Reinforcement allows a softer allocation without losing shape.
A belly-area panel laminated to a suitable stiffener can hold a flat surface, though it will behave differently under load and may telegraph the stiffener edge if the stiffener is too small or the fold area is not skived. As with any substitution, it should be validated on a trial assembly rather than assumed.
Area Allocation by Bag Type
Different products need different panels protected.
Diaper Bags and Family Bags
Family bags need stable panels where load and structure concentrate.
Base and body panels should come from back and butt material, because a family bag is set down loaded and must keep its shape when open. Flap and closure areas benefit from dense material that resists creasing, while the extensive internal pocketing is the natural home for belly and shoulder material.
Backpacks
Backpacks need dense material where the pack meets the body and the load.
The back panel, base and strap attachment zones should be cut from back-area material, since these areas carry load and rub against clothing. Side panels and secondary compartments can use shoulder material, and internal organisation can use looser areas.
Totes and Handbags
Totes expose area quality more than any other product.
Large visible body panels and handles must come from the best available material, because the whole silhouette depends on those surfaces staying flat. Handles deserve particular attention: material with high stretch will elongate under load, and no amount of finishing corrects that.
Wallets and Small Leather Goods
Small leather goods use small pieces, which changes the calculation.
Because panels are small, a wallet can be built entirely from the dense area of a single hide without consuming much of it, and the discipline lies in keeping every visible surface from the same area. The risk here is using a convenient offcut from the belly for a visible outer panel.
Area Allocation by Product
| Product | Must use dense back area | Can use shoulder | Can use belly or loose areas |
|---|---|---|---|
| Diaper and family bags | Base, body, flap, closure | Sides, secondary panels | Internal pocketing, linings |
| Backpacks | Back panel, base, strap zones | Side panels, compartments | Internal organisation |
| Totes and handbags | Body panels, handles | Gussets, secondary panels | Internal pockets, linings |
| Wallets and small goods | All visible exterior panels | Small internal parts | Hidden backing, stiffeners |
Incoming Inspection and Area Verification
Area quality can be checked quickly, and it should be checked before cutting.
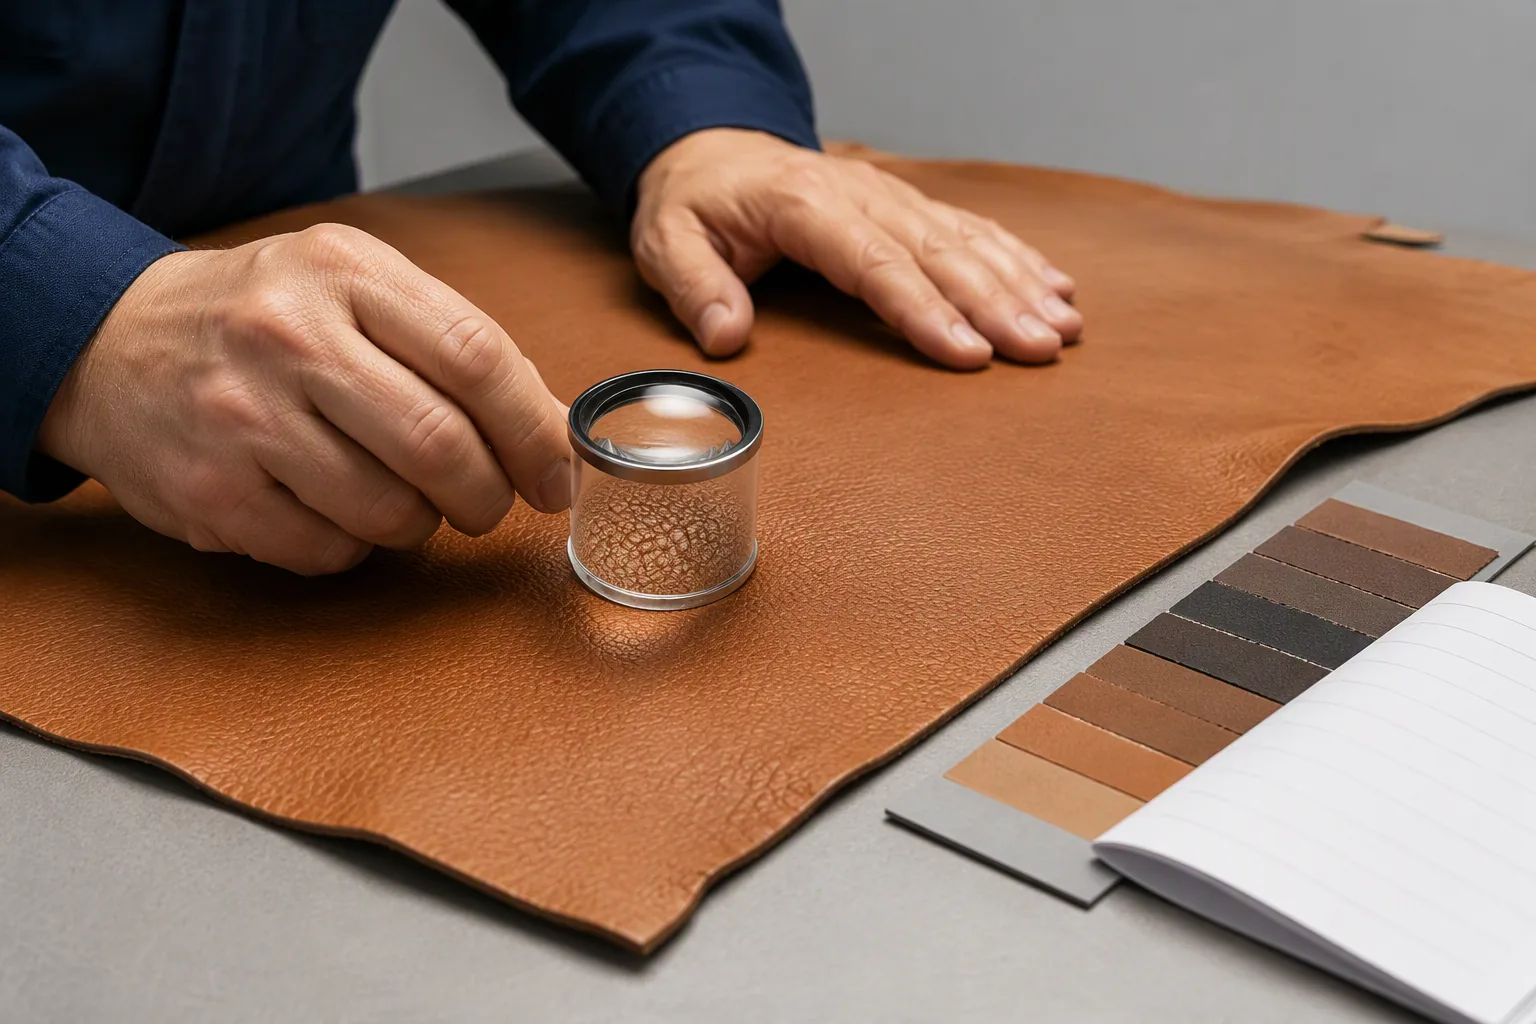
Checking Grain Tightness
Grain tightness is assessed by hand and eye together.
Pressing the surface with a fingertip and watching how the grain responds shows whether the material is springy and tight or soft and easily displaced. Holding the panel at an angle to the light reveals whether the surface is even or shows open, uneven grain across the area.
Checking Stretch Behaviour
A simple pull test predicts bagging better than any measurement.
Gripping the panel with both hands and applying moderate tension shows how much the material stretches and how much it returns. Material that stretches easily and stays stretched should not go on a panel that must hold a flat surface. The test should be done in the direction the panel will be stressed.
Recording Area Quality
Recording area results turns allocation into a repeatable decision.
Noting which areas of a lot met the requirement, and which panels they were used for, builds a picture of how each supplier’s hides actually behave. That record is what allows a tannery to be given precise feedback instead of a general complaint.
Sample Panels and Reference Cuts
Reference panels make area quality comparable.
Keeping a panel cut from the back area and one from the belly of an approved lot allows each new lot to be compared directly. It is the same principle as a colour reference, applied to structure, and it is just as effective at preventing quiet drift.
Common Area-Related Defects
Most structural complaints trace back to allocation rather than to leather quality.
Baggy Panels After Use
Bagging is stretch that never recovered.
It happens when belly or flank material is used on a panel that carries load or must stay flat, and it becomes visible after weeks of use rather than in the workshop. The fix is allocation: those panels need dense, low-stretch material, and reinforcement is not a reliable substitute once the panel is loaded.
Wrinkling Around Seams and Corners
Wrinkling is often a mismatch between grain and pattern.
Loose grain puckers when sewn into a curved seam or a corner, because the material cannot take the compression the pattern imposes. Either the area allocation changes, or the pattern is adjusted to give the material somewhere to go.
Collapse of Large Panels
Large panels need density because they have the most area to lose.
A big flat panel cut from an extensible area will sag, ripple and lose its plane even if it is reinforced, because the material continues to relax under its own weight. Large exposed panels are the strongest case for using back-area material without compromise.
Defect Reference
| Symptom | Likely cause | Practical fix |
|---|---|---|
| Panels bag out after weeks of use | Belly-area material on a loaded panel | Re-allocate to back-area material |
| Ripples along a curved seam | Loose grain on a compressive seam | Change area or revise the seam shape |
| Large panel loses its plane | Extensible material on a big surface | Use back-area material or re-design |
| Handle elongates under load | High-stretch material in handles | Specify low-stretch back-area material |
| Base distorts when loaded | Belly material in the base | Move base to dense area, add support |
| Visible grain mismatch on one bag | Panels cut from different areas | Align area allocation with matching groups |
Working With Tanneries on Area Selection
Area quality is a purchasing subject, not only a production one.
Specifying Usable Area
The specification should describe the area requirement, not only the grade label.
Stating which panels are critical, and how much dense material a hide must contain to serve them, gives a tannery something to select against. That is more useful than a grade name that different suppliers interpret differently.
Price and Grade Relationship
Area availability is priced into the material.
Hides with a large, clean prime area cost more per unit of surface, because the material that can reach a visible panel is what the buyer is actually purchasing. Judging quotations by price per unit of area without considering usable area produces a decision that looks cheaper and performs worse.
Consistency Between Lots
Consistency of area quality matters as much as the average level.
A supplier whose hides vary in where the dense material sits is harder to plan around than one whose hides are consistently shaped, even if the average quality is similar. Tracking this across lots turns a vague impression of variation into a workable selection criterion.
Reducing Waste Without Sacrificing Quality
Waste reduction should come from design and planning, not from compromising panels.
Panel Reduction and Nesting
Design decisions reduce waste more than cutting skill does.
Merging small panels, splitting large ones along less visible lines, and removing decorative pieces that consume prime area all raise yield without weakening the product. Nesting improvements help, but they operate within the constraint the pattern creates.
Splitting Panels
A large panel can sometimes become two smaller ones.
Splitting a visible panel along a structural line, such as a horizontal seam or a design seam, allows the pieces to be cut from different areas without an obvious compromise, provided the seam is deliberate and the matching still holds. This is a legitimate technique when it is designed rather than improvised.
Using Loose Areas Deliberately
Loose material is only a problem when it is used accidentally.
Belly and flank material performs well in internal organisation, pocketing, linings, soft gathered sections and parts that are never placed under tension. Planning for it explicitly raises yield and removes the temptation to slip it onto a visible panel when the schedule is tight.
Cost and Planning Implications
Anatomy affects cost through yield, and yield is where most of the money is.
Yield Calculations
Realistic yield must account for area, not only for surface.
Calculating consumption as square area alone overstates usable material, because some of that area can never reach a visible panel. Working with effective area, and with the panel list sorted by area requirement, produces a consumption figure that survives contact with production.
Inventory Planning by Area
Hides are not interchangeable, so inventory thinking has to change.
A run that needs a large quantity of prime-area material cannot be covered by any number of hides whose prime area is small, so inventory planning should track the usable area the programme needs rather than only the total quantity on hand. This is especially relevant for structured products where almost every visible panel is area-critical.
Reorders and Continuity
Reorders need area consistency as much as colour consistency.
A repeat order that arrives with the same colour but a smaller prime area will change both yield and panel quality, and the change may not be obvious until cutting begins. Comparing area behaviour against retained reference panels at goods-in catches the drift early.
How Anatomy Interacts With Leather Type
Anatomy and leather type are two variables, and they compound.
Split and Top Grain From the Same Hide
The upper and lower layers of a hide behave differently by nature.
The grain layer carries the tight surface and the dense fibre structure, while the split layer beneath it is softer, more open and more extensible. This is why a split can be finished, printed and used legitimately, but rarely performs like grain material on a panel that must hold its plane.
Anatomy in Soft and Waxy Leathers
Soft leathers redistribute anatomy effects rather than removing them.
Heavy fatliquor and waxy finishes soften even the dense back area, which makes temper less predictable across a hide on those articles. On such leathers, the difference between areas is still present, but it shows up more in how a panel relaxes over time than in how it feels on the bench.
Anatomy in Finished and Coated Leathers
Finishing can mask anatomy visually while leaving it structurally intact.
A pigmented or printed finish can make a belly panel look even and consistent, because the surface is levelled and the natural grain is covered. The stretch behaviour underneath does not change, so a coated leather can still bag out in use, and allocation rules should be based on structure rather than on appearance.
Common Misconceptions About Hides
A few assumptions cause recurring allocation errors.
Bigger Hides Are Not Always Better
Size and usable area are different things.
A large hide with a small prime area may deliver fewer visible panels than a smaller hide with a generous back, which is why selecting on total surface area alone produces disappointing yield. The relevant question is always how much of the hide can serve the panels that must be cut from dense material.
Defects Are Not the Only Reason to Downgrade an Area
Many downgrade decisions have nothing to do with visible faults.
Loose grain, high stretch and thickness reduction all make an area unsuitable for structural panels while leaving it visually acceptable. An allocation rule based only on visible defects will still put baggy-prone material on visible panels, and the result is a complaint about shape rather than about surface.
Area Cannot Be Substituted by Specification
No specification compensates for wrong allocation.
Thickness, colour and temper can all be correct while a panel still bags out, because stretch behaviour across the hide is not captured by any of those single figures. The allocation decision is the control that prevents it, and it is made by people at the cutting table rather than by a document.
Frequently Asked Questions
Which part of a hide is best for bag making?
The back and butt area, which carries the densest fibre, tightest grain, greatest thickness and lowest stretch. It is the right material for panels that must stay flat and hold shape, such as front panels, flaps, base panels and handles.
Why does a bag go baggy after a few weeks?
Bagging is stretch that did not recover, and it nearly always means belly or flank material was used on a panel that carries load or must stay flat. Changing the allocation to dense back-area material fixes the cause, while reinforcement alone rarely does.
Can I use belly leather anywhere on a bag?
Yes, in places that are not seen or loaded: internal pocketing, linings, pocket backs, gathered or pleated soft sections, and hidden reinforcement. It performs badly only when it is used accidentally on a visible panel that has to hold its shape.
Does a higher hide grade guarantee better bags?
No. Grade describes how much usable material a hide contains, not how well the panels were chosen. Two hides of the same grade behave differently if the shape of their prime area differs, and the cutting plan makes the final decision about quality.
How do I check area quality at goods-in?
Press the surface to feel how the grain responds, hold the panel against the light to see whether grain is even, and pull it moderately in the direction the panel will be stressed to see how much it stretches and recovers. Compare the results with retained reference panels from an approved lot.
Does thickness tell me which area a panel came from?
It gives a useful indication, because thickness is greatest over the back and butt and reduces toward the belly, but it is not conclusive on its own. Grain tightness and stretch behaviour are the more reliable signals, and they should be assessed together with thickness.
Why do handles stretch and lose shape?
Handles carry load directly and are usually handled constantly, so material with high stretch elongates and does not recover. Handles should be cut from dense, low-stretch back-area material, and the direction of stretch should be aligned against the load.
Is it worth splitting a large panel to raise yield?
Sometimes. Splitting along a deliberate structural or design seam lets the two pieces come from different areas without an obvious visual compromise, and it can raise yield meaningfully. It works when the seam is a design decision rather than a response to a shortage of material.
How does area quality affect leather cost?
Hides with a large, clean prime area cost more, because what a bag maker actually buys is the material that can reach a visible panel. Comparing quotes on price per unit of area without accounting for usable area makes the cheaper option look better than it is.
Can reinforcement compensate for loose material?
It can hold a flat surface in light use, but it is not a reliable substitute on loaded panels or large surfaces, because the material continues to relax. Reinforcement is best used alongside appropriate area allocation, and any substitution should be validated on a trial assembly.
Why is area allocation more important than leather type?
Because the same hide contains material suitable for very different jobs. Allocation decides whether a panel will stay flat and how it ages, and it costs nothing beyond planning discipline. Getting it wrong produces structural failures that no leather type can prevent.
The Bottom Line
Hide anatomy is a design constraint, and using it well is most of what separates a durable bag from a tired one.
List the panels that must stay flat, cut them from the dense back and butt area, allocate medium-demand panels to the shoulder, and place internal and gathered parts on the belly, neck and extremities on purpose. Combine area allocation with colour matching groups so one decision serves both requirements, and verify arriving lots against retained reference panels before cutting.
Then cost the programme on usable area rather than total surface. Effective area is what the bag is actually made of, and planning on it is the difference between a yield estimate and a yield.
