
Leather Bag Reinforcement: Heat Fusing and Interlining
Leather Bag Reinforcement: Heat Fusing and Interlining
Most leather bags are not made from leather alone. Behind the panels, and often bonded directly to them, sits a layer of board, foam, non-woven interlining or a woven fabric, and that hidden layer decides whether the bag stands up, holds a fold, resists sagging and keeps its shape after a year of use.
As a bag manufacturer, we treat reinforcement as part of the leather specification rather than a separate accessory line. This guide explains what reinforcement does to a panel, how heat fusing bonds it to leather, how leather responds to heat and adhesive, how the press is set, what the common faults look like, and how buyers should specify the combination before a programme starts.
Reinforcement is a decision about how a panel behaves, not about how it looks. It is invisible in the finished bag and visible in every year the bag is used.
- Why Bags Need Reinforcement
- What Reinforcement Does to a Panel
- The Reinforcement Materials
- Heat Fusing: How It Works
- Adhesives, Coatings and Compatibility
- How Leather Responds to Heat
- Setting and Controlling the Press
- Fusing Faults and Their Causes
- Board, Foam and Interlining in Practice
- Choosing Reinforcement by Bag Part
- Reinforcement and Edge Finishing
- Reinforcement, Stitching and Assembly
- Weight, Temper and Hand Feel
- Testing the Bond
- Sampling, Bulk and Change Control
- Specifying and Buying the Combination
- Common Mistakes and How to Avoid Them
- Frequently Asked Questions
- The Bottom Line
Why Bags Need Reinforcement
Leather alone rarely delivers every property a bag needs.
What Leather Cannot Do on Its Own
Leather is strong but not stiff.
A leather panel resists tearing well and resists bending poorly, so a bag built from leather alone tends to collapse along its large flat areas and sag where it is loaded. A thin leather also changes dimension and temper across the hide, which makes consistent behaviour difficult without help.
The Three Jobs Reinforcement Does
Reinforcement solves three problems at once.
It adds stiffness so a panel holds a shape, it stabilises dimension so a panel moves less with moisture and load, and it distributes load so stress does not concentrate at stitching or hardware. Most programmes rely on at least two of the three.
Why It Is Bonded Rather Than Loose
Loose layers slip, bonded layers do not.
A reinforcement fixed only by stitching or by edge seams can shift, wrinkle or billow inside the panel, which shows through the leather as an uneven surface. Bonding the layer to the leather fixes its position across the whole panel area.
What Reinforcement Does to a Panel
The effect is easier to understand as a set of changes.
Stiffness and Shape
Stiffness is the main reason reinforcement exists.
Adding a layer with different bending behaviour changes how much the panel resists folding, which is what allows thin leather to be used on a structured bag without it collapsing. The stiffness of the finished panel depends on the thickness and stiffness of both layers together.
Dimensional Stability
A reinforced panel moves less.
Bonding restricts how far a leather panel can extend or shrink, because the second layer does not respond to moisture the same way. This is one of the cheapest ways to hold a dimension that leather alone could not guarantee.
Weight and Thickness
Every benefit is paid for in weight.
Reinforcement adds weight and thickness to a panel, which affects the total weight of the bag, the seam bulk and how the edge finishes. Choosing a lighter reinforcement that still delivers the required stiffness is usually better than choosing a heavier leather.
Surface Behaviour
Reinforcement changes how leather looks.
A bonded layer that is too stiff for the leather can produce a surface that looks slightly flat or glassy instead of natural, and a layer that is too thick shows a step at the edge. Surface appearance is often the first visible sign that the combination was wrong.
The Reinforcement Materials
Four families cover nearly all bag programmes.
Board
Board delivers stiffness with little thickness.
Paper-based and fibre boards are used where a panel must stay flat and firm, such as bag bases, dividers and structured fronts. They are stiff for their weight, but they crease permanently if the panel is bent sharply.
Foam
Foam adds body and softness.
Foamed sheets give a panel a padded feel and recover after light compression, which suits handles, straps, protection areas and any surface the customer touches. Foam is chosen by thickness and by how quickly it recovers.
Non-Woven Interlining
Non-woven interlining is the everyday stabiliser.
Spun-bonded and needle-punched fabrics are cheap, bond well under heat, and are used to stop leather from stretching and to give a panel a more even hand. They add little stiffness, so they are usually combined with something firmer.
Woven and Knitted Interfacing
Woven interfacing behaves more like fabric.
Woven and knitted interfacings follow the leather as it curves, which suits soft bags, folded panels and shapes that must not crease sharply. They cost more but distort less under repeated loading.
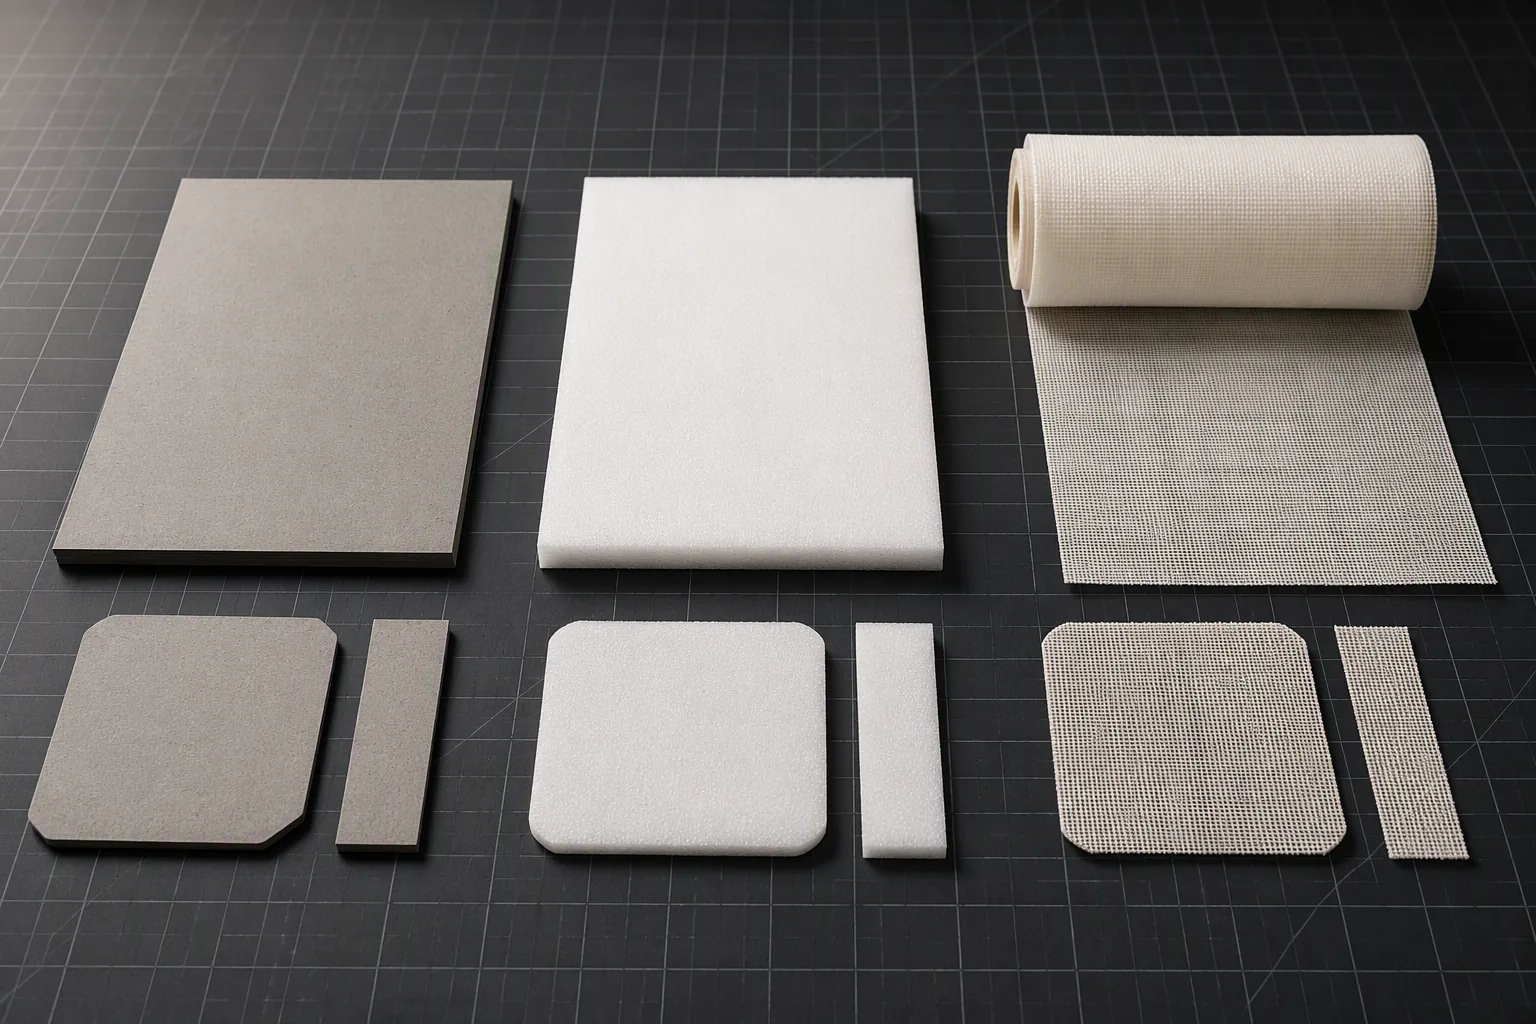
| Reinforcement | Main benefit | Where it is used | Main limitation |
|---|---|---|---|
| Board | High stiffness | Bases, dividers, structured fronts | Creases permanently if bent |
| Foam | Padding and recovery | Handles, straps, protection areas | Adds thickness and weight |
| Non-woven interlining | Stability at low cost | General panels, linings | Adds little stiffness alone |
| Woven or knitted interfacing | Flexibility with support | Soft bags, folded panels | Higher cost |
| Combined layers | Stiffness plus softness | Structured bags with soft-touch surfaces | More process control needed |
Heat Fusing: How It Works
Fusing is a controlled bonding process.
The Mechanism
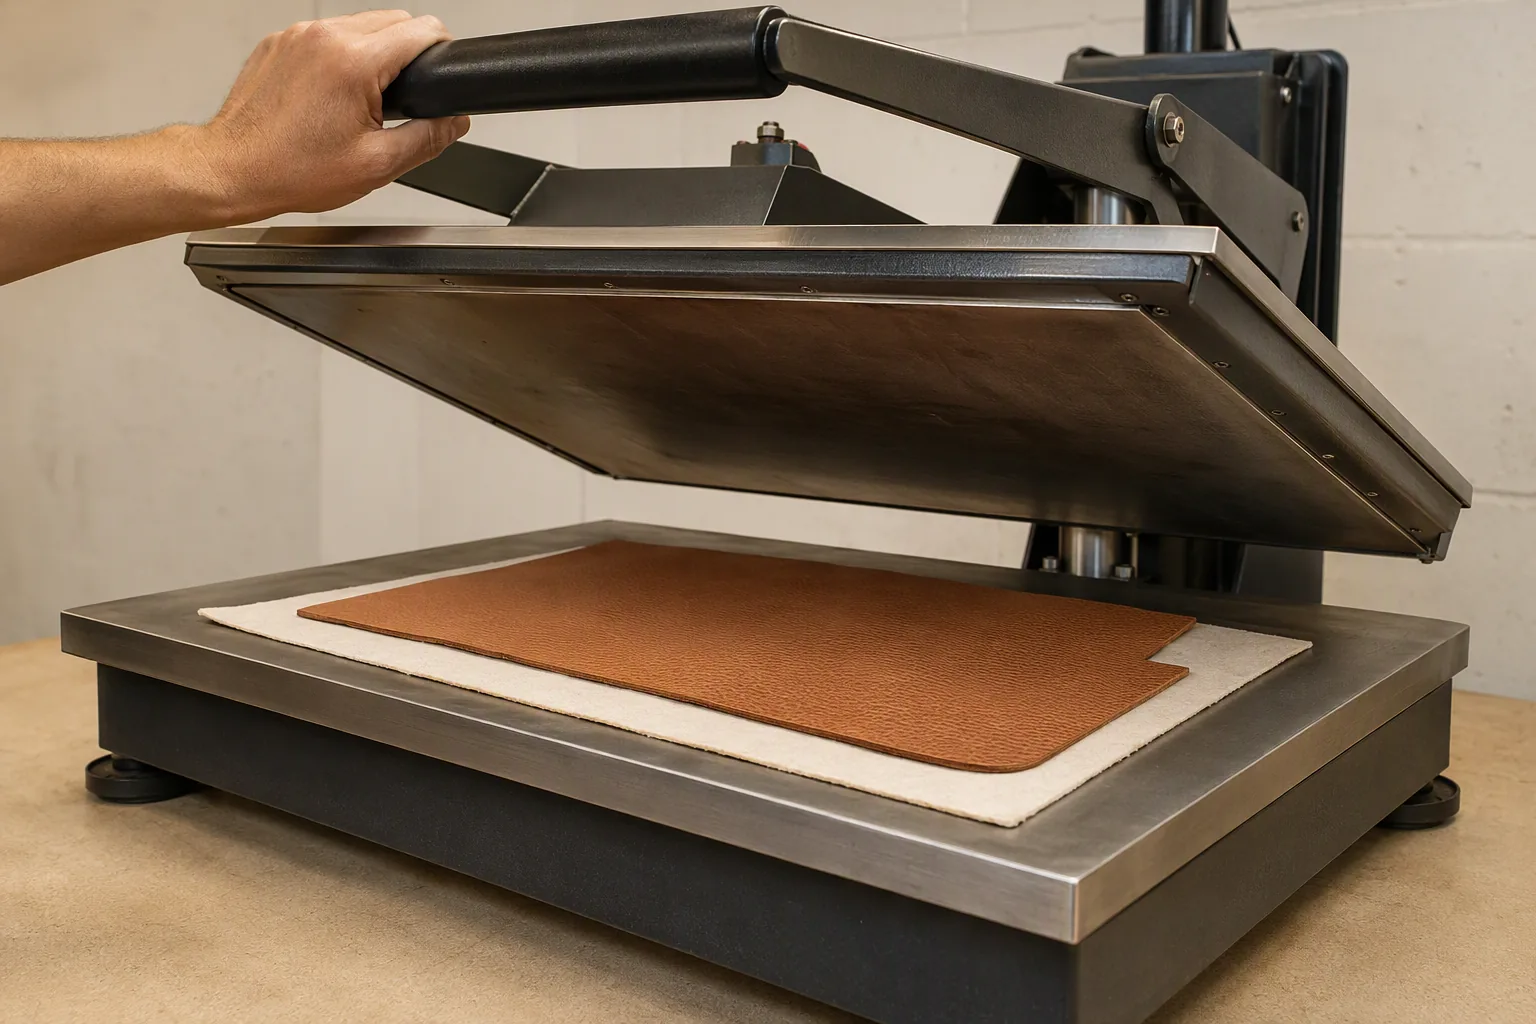
Heat plus pressure plus time makes the bond.
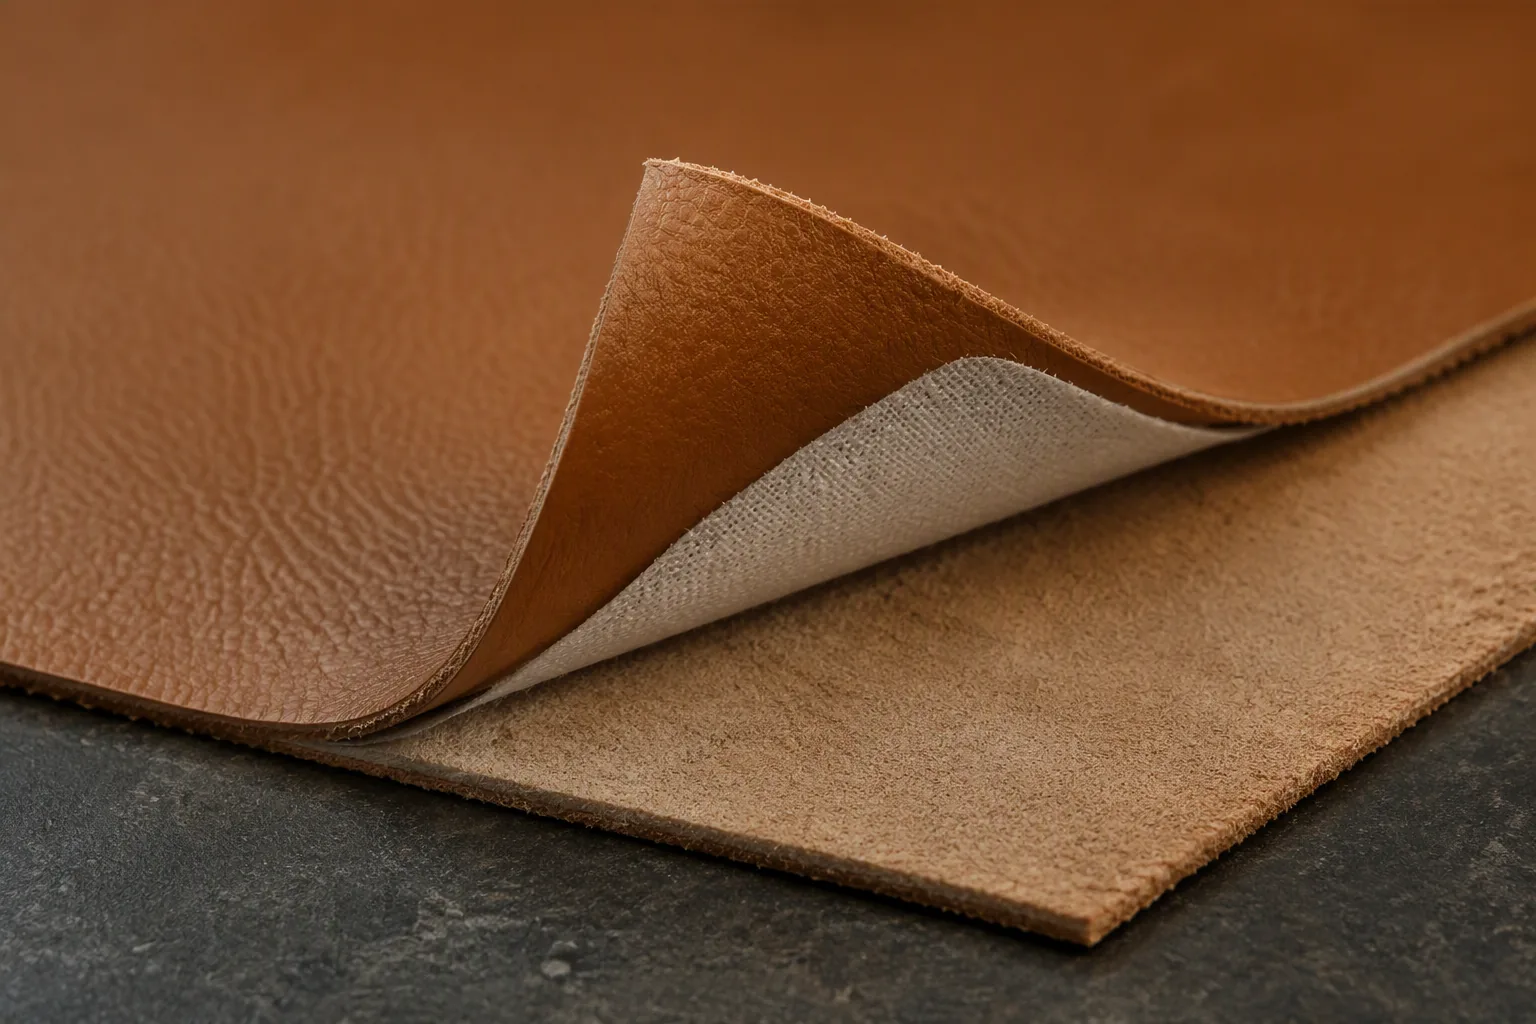
The reinforcement carries a heat-activated adhesive coating. Under the press, the adhesive softens and flows into the surface it touches, and after cooling it sets and holds the two layers together. All three variables have to be right at the same time.
The Fusing Sequence
Order matters more than it looks.
Material is placed on the bed, the layer is aligned, the press closes for a set dwell time, and the panel then cools under restraint before it is moved. Moving a hot panel or letting it cool unsupported undoes much of the benefit.
Fusing versus Other Fixing Methods
Not every layer needs heat.
Stitched reinforcement is used where heat would damage the leather finish or where the panel must stay flexible, and spray adhesives are used for small parts. Heat fusing is the fastest and flattest method, which is why it dominates panel work.
When Not to Fuse
Some constructions should avoid heat entirely.
Fusing is unsuitable where the leather finish cannot tolerate the required temperature, where the panel must remain fully flexible, or where the bonded area would later be skived or folded sharply. In those cases the reinforcement is stitched, sprayed or omitted, and the panel is designed around that choice.
Decorative and heavily finished leathers also deserve caution, because the finish rather than the leather itself is usually the first thing to fail under heat. Where a programme depends on a particular finish, bonding a test panel before the order is placed is the cheapest way to find out.
Adhesives, Coatings and Compatibility
The bond is only as good as the chemistry between the two layers.
Adhesive Types on Reinforcement
Reinforcements arrive pre-coated.
Most bag reinforcement is supplied with a heat-activated coating, and the coating is what actually bonds. Coatings differ in how quickly they activate, how much pressure they need and how they behave after cooling, so two reinforcements that look identical can fuse very differently.
Coating and Leather Finish Compatibility
Not every coating suits every leather.
Aniline and lightly finished leathers absorb adhesive differently from heavily coated or pigmented surfaces, and a coating that bonds well to one may release from the other. Where a programme uses a new leather finish, the combination should be bonded and tested before an order is committed.
Adhesive Failure and Delamination
Delamination is progressive.
Once a bonded area begins to release, movement during use works the release further across the panel, which is why small bubbles or lifted corners are treated as a warning rather than a cosmetic issue. Heat, solvent and repeated flexing are the usual triggers.
Compatibility Questions to Ask
| Question | Why it matters |
|---|---|
| Which adhesive coating is on the reinforcement? | Determines the fusing window and the pressure needed |
| Which leather finish will it be bonded to? | Absorption and release differ by finish |
| Was this exact combination previously bonded and tested? | New combinations behave unpredictably |
| How does the bond behave after repeated flexing? | Delamination usually starts at a flex line |
| Does the leather tolerate the required temperature? | Heat damage is permanent and visible |
How Leather Responds to Heat
Leather is more heat-sensitive than most reinforcements.
Heat Damage to the Finish
Finish is the first thing to suffer.
Excessive temperature can dull, darken, blister or lift a finish, and the damage appears on the surface the customer sees. Where a leather is heat-sensitive, the fusing window narrows or the programme has to move to a stitched or cold-bonded construction.
Shrinkage and Hardening
Heat removes moisture and stiffens the panel.
Leather that gets too hot loses moisture, contracts and can harden permanently, which changes both the dimension and the feel of the panel. Cooling under restraint is what limits this effect in normal fusing.
Glazing, Marking and Press Marks
The press leaves evidence of its own settings.
A shiny area, a visible plate outline or a flattened grain across a panel all indicate that pressure or temperature was above the range the leather tolerates. These marks cannot be corrected afterwards, so the setting has to be right before the panel goes in.
Moisture and Conditioning Before Fusing
Conditioning protects the leather.
Leather that has been allowed to reach a stable, moderate moisture content tolerates fusing better than leather that is very dry, because the moisture it holds moderates the temperature it actually reaches. Conditioning before fusing is a small step with a large effect on rejects.
Setting and Controlling the Press
Fusing quality is a machine-setting question.
Temperature
Temperature activates the adhesive and endangers the leather.
The working range is defined by the reinforcement’s coating, and the upper limit is defined by the leather’s heat sensitivity. The usable window sits where both are satisfied, and it is usually narrower than either specification suggests on its own.
Pressure
Pressure moves heat and adhesive into the surface.
Too little pressure leaves the adhesive sitting on top of the grain, where it will release under flexing; too much flattens the grain and leaves press marks. Pressure is also the variable most affected by a worn or uneven press plate.
Dwell Time
Time is the variable that gets shortened under deadline pressure.
The adhesive needs a defined period to flow properly, and shortening the dwell to increase output produces a bond that looks acceptable and fails later. Dwell time belongs in the work instruction, not in the operator’s judgement.
Cooling and Handling
Cooling under restraint is part of the process.
A freshly fused panel is still soft, and moving, folding or hanging it before it has cooled under a flat surface introduces distortion that no later step removes. A defined cooling station is one of the cheapest quality controls in the workshop.
Setting and Control Reference
| Variable | What it controls | Symptom when too high | Symptom when too low |
|---|---|---|---|
| Temperature | Adhesive activation | Shine, blisters, finish lift | Bond fails, layer peels |
| Pressure | Adhesive penetration | Grain flattening, plate marks | Bubbles, weak bond |
| Dwell time | Adhesive flow | Heat damage to the leather | Incomplete bonding |
| Cooling under restraint | Final flatness | Distortion locked in | Wrinkles and waves |
Fusing Faults and Their Causes
Most fusing defects repeat across programmes.
Fault Table
| Fault | Usual cause | Correction |
|---|---|---|
| Bubbles between the layers | Low pressure or trapped moisture | Raise pressure, condition the leather first |
| Lifted corners or edges | Bond never formed at the perimeter | Increase dwell, re-cut the reinforcement to fit |
| Shiny or glazed surface | Temperature above the leather’s limit | Lower temperature, lengthen dwell to compensate |
| Visible plate outline | Pressure too high or plate uneven | Reduce pressure, service the press plate |
| Layer separates after flexing | Adhesive incompatible with the finish | Re-test another coating or change the bonding method |
| Panel distorted after fusing | Moved while still hot | Add a cooling station under restraint |
| Reinforcement shows through the surface | Layer too thick or too stiff | Choose a thinner or softer reinforcement |
| Panel too stiff to fold | Wrong board or foam for the part | Match the material to the fold requirement |
Diagnosing Where It Went Wrong
Check the bond, then the settings, then the material.
If the bond is even but accompanied by surface shine, temperature is the likely cause. If the bond is patchy, pressure and flatness come first. If the bond forms but releases later, the adhesive and finish combination is the problem.
Board, Foam and Interlining in Practice
Each material has a natural place in a bag.
Panels That Must Stay Flat
Flat parts want board.
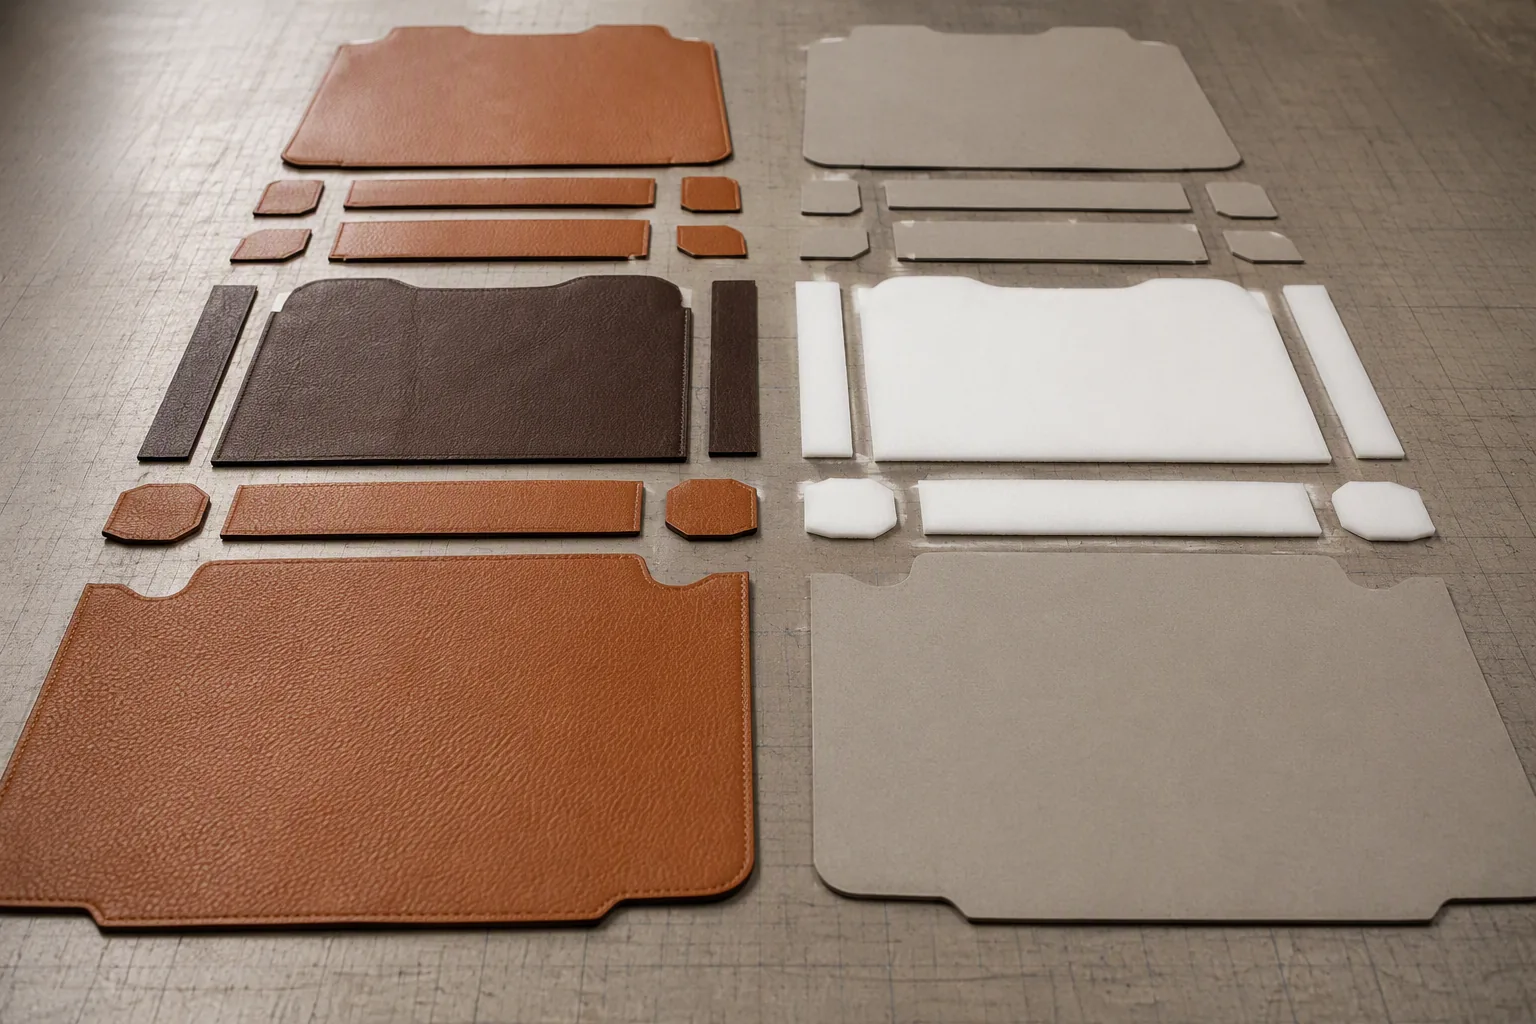
Bag bases, dividers, laptop sleeves and structured fronts are usually built on board or a board substitute, with the leather bonded to one face. The key requirement is that the panel is never bent sharply after bonding, because that damage is permanent.
Parts That Must Feel Soft
Soft parts want foam.
Handles, strap pads, protection areas and any surface the customer grips are lined with foam to give a padded feel and to recover after compression. Foam thickness controls how much padding the customer perceives.
Parts That Must Flex
Folding parts want woven or knitted support.
Panel edges that fold, bag mouths that open and close, and soft bag bodies need a support layer that bends with the leather rather than creasing. Non-woven interlining adds stability here without the permanent creasing of board.
Choosing Reinforcement by Bag Part
Match the material to the job the part performs.
Reading the Part, Not the Bag
Two panels on the same bag need different support.
A base and the front panel of the same tote perform different jobs, and treating them as one specification is a common cause of a bag that is either too soft at the bottom or too stiff at the front. The specification is written per part.
Decisions per Part
| Bag part | Typical reinforcement | Reason |
|---|---|---|
| Base | Board or stiff combined layer | Must stay flat under load |
| Front and back panels | Light board or combined layer | Shape without excessive weight |
| Gusset and sides | Woven interfacing or light board | Must flex as the bag opens |
| Handle and strap body | Foam plus woven support | Padding with load stability |
| Strap anchor area | Firm board or combined layer | Concentrates load at hardware |
| Bag mouth and opening edge | Woven interfacing | Repeated flexing without creasing |
| Lining panels | Non-woven interlining | Stability at low weight |
| Pocket panels | Light interlining or none | Little load, minimal support needed |
Where Reinforcement Should Be Omitted
Some parts are better left unsupported.
Small internal pockets, decorative trims and soft fold-over flaps often behave better without reinforcement, because added stiffness there makes the bag awkward to use. Leaving a panel unreinforced is a decision, not an omission.
Reinforcement and Edge Finishing
Edges reveal what is inside the panel.
Edge Thickness and Fold Lines
Reinforcement adds thickness exactly where the edge is finished.
A folded or painted edge has a small thickness budget, and doubling that thickness with a board or foam layer makes a clean fold impossible. Edge areas are therefore usually left unbonded, or reduced before folding.
Skiving Around Bonded Areas
A bonded panel cannot be skived like plain leather.
Skiving across a bonded area risks cutting into the adhesive layer and separating the reinforcement from the leather, so thinning must be planned before fusing rather than after. Bonded areas and skived areas should not overlap.
Edge Paint and Burnishing on Bonded Panels
Finish quality depends on the substrate.
A firm, even substrate under the edge gives a cleaner painted edge, while a substrate that flexes unevenly produces uneven build-up and early cracking. Our guide to edge finishing covers how the substrate affects the finished edge.
Reinforcement, Stitching and Assembly
Reinforcement changes how the panel behaves at the needle.
Stitching Through Bonded Layers
Not every reinforcement can be sewn through.
Board resists a needle, blunts it and can crack along the stitch line, while foam and interlining accept stitching easily. Where a firm layer must be sewn through, the design usually keeps stitches away from the stiffest area.
Seam Bulk and Folded Seams
Bulk is the practical limit.
Where a bonded panel is folded into a seam, the reinforcement adds to the stack and the seam becomes hard to press flat. Reducing the reinforcement close to the seam allowance, or stopping it short of the fold, keeps the seam manageable.
Assembly Order
The sequence has to be designed.
Fusing usually happens before assembly, because a bonded panel is flat and easy to handle, while attaching a reinforcement afterwards is slow and rarely as even. Any operation that must be done before fusing belongs in the work instruction.
Weight, Temper and Hand Feel
The hidden layer is part of how the bag feels.
Effect on Temper
A thin leather can be made to behave like a firm one.
Bonding a support layer changes the temper of a panel without changing the leather, which gives designers a way to reach a target feel using a lighter, more available material. That flexibility is also a risk, because the same leather can be specified two different ways.
Effect on Weight
Weight is cumulative across a bag.
Reinforcement weight multiplies by panel area, so a small change applied to every panel of a large bag becomes significant. Weight should be tracked per panel and totalled, rather than assessed by feel at the sample stage.
Consistency Between Panels
Consistency matters more than the absolute figure.
Two panels that must behave alike should carry the same reinforcement in the same position, because a small difference in support is more noticeable than a small difference in stiffness overall.
Testing the Bond
A bond that is not tested is a bond that is assumed.
Test Methods
Simple tests reveal most failures.
Peel and flex tests are the practical methods in a bag workshop: applying a peeling force to a bonded area shows whether the adhesive has taken hold, and repeated flexing along a fold line shows whether it will survive use. Both are simple and both should be recorded.
What to Test and When
| Test | Method | What it tells you |
|---|---|---|
| Peel test | Lift the reinforcement from the leather and record the force and the failure point | Whether the adhesive bond is adequate |
| Repeated flex test | Flex a bonded sample along a fold line many times | Whether the bond survives the bag’s real movement |
| Heat exposure test | Hold a bonded sample at the upper temperature limit | Whether the leather finish can tolerate the process |
| Surface inspection after fusing | Inspect for shine, marks and blisters under good light | Whether the settings damage the appearance |
| Panel flatness check | Lay the cooled panel flat and check for waves | Whether cooling under restraint is working |
| Dimensional check after conditioning | Measure the bonded panel before and after conditioning | Whether the combination holds its size |
Recording the Result
The record is what makes repeating the process possible.
Settings, materials, coating type, test result and outcome should be recorded for each approved combination, so the same result can be produced on a repeat order without rediscovering it.
Sampling, Bulk and Change Control
Fusing problems are cheapest to find early.
What the Sample Must Prove
A sample proves the combination, not the bag alone.
The sample should show that the bonded panels are flat, the edges finish cleanly, the seams press flat, the panel does not shine or mark, and the bag keeps its shape after being loaded. Each of those is a fusing outcome rather than a bag outcome.
Incoming and In-Process Checks
Two checks cover most risk.
Incoming inspection should confirm the reinforcement matches the approved specification, including its coating, and in-process checks should confirm the press settings at the start of each run with the first panel inspected rather than assumed.
Controlling Changes
A change in either layer changes the bond.
Switching the leather, the reinforcement, the adhesive coating or the process settings all affect the result, so each change should be re-sampled and approved. Keeping the approved combination documented is what prevents a later delivery being bonded with a different material and failing months afterwards.
Specifying and Buying the Combination
The specification is a short document doing a large job.
What to Write Down
Write the combination, not the components.
A useful specification names the leather, the reinforcement by type and weight, the adhesive coating, the press settings, the parts that receive reinforcement and the parts that do not, and the test method and acceptance criteria. Written this way, the requirement can be verified at inspection rather than argued about.
Working With Suppliers
Reinforcement suppliers and tanneries rarely know each other’s products.
A bag factory sits between the two and is usually the only party that has bonded the specific combination. Asking the reinforcement supplier to confirm the fusing window and the tannery to confirm heat tolerance, then verifying the pair in the factory, is the practical sequence.
Common Mistakes and How to Avoid Them
| Mistake | Consequence | Prevention |
|---|---|---|
| Fusing at the reinforcement supplier’s maximum temperature | Shine, blisters or lifted finish | Set the window from the leather’s limit as well |
| Shortening dwell time to raise output | Bonds that pass inspection and fail in use | Fix the dwell time in the work instruction |
| Moving panels while still hot | Distortion no later step removes | Use a defined cooling station under restraint |
| Reinforcing every panel the same way | Bases too soft, fronts too stiff | Specify reinforcement per part |
| Bonding through edge and fold areas | Edges too thick to finish cleanly | Keep reinforcement clear of edges and folds |
| Skiving a bonded panel | Cut adhesive layer and separation | Plan thinning before fusing |
| Testing only the reinforcement | The combination is what fails | Test the bonded pair at each material change |
| No record of the approved settings | The result cannot be repeated | Document settings, materials and test results |
Frequently Asked Questions
Why is reinforcement needed in a leather bag?
Leather is strong but not stiff, so large panels tend to collapse and loaded areas sag. Reinforcement adds stiffness, stabilises the panel dimensionally and spreads load away from stitching and hardware, which is what allows a thin leather to be used on a structured design.
What is heat fusing and how does it bond reinforcement to leather?
Reinforcement is supplied with a heat-activated adhesive coating. Under a press, heat and pressure make the coating flow into the leather surface, and after cooling it sets and holds the two layers together. Temperature, pressure and dwell time all have to be correct at the same time.
Can fusing damage the leather surface?
Yes. Excessive temperature can dull, darken, blister or lift a finish, and excessive pressure can flatten the grain or leave a visible plate outline. Both are permanent, which is why the working window has to satisfy the leather’s heat limit as well as the adhesive’s requirement.
Which reinforcement should be used for a bag base?
Bases are normally built on board or a firm combined layer, because they must stay flat under load and give the bag a stable footprint. The important constraint is that a board-based panel must not be bent sharply after bonding, since that creases it permanently.
Is board or foam better for bag handles?
Foam, usually combined with a woven support layer. Handles need padding and recovery where the customer grips them, plus enough stability to resist lengthening under load, which a firm board would make uncomfortable and prone to creasing.
Why does bonded reinforcement sometimes come away from the leather?
Delamination usually starts where the adhesive never formed a proper bond, most often because pressure was low, dwell was short, or the adhesive coating was incompatible with that leather finish. Once it starts, movement during use spreads the release, so small lifted areas should be treated as a warning.
Should bonded panels be skived?
Thinning should be planned before fusing, not after. Skiving across a bonded area risks cutting into the adhesive layer and separating the reinforcement from the leather, so bonded areas and skived areas are normally kept separate in the panel layout.
How long should a fused panel cool before handling?
Until it has cooled flat under restraint. The exact time depends on the panel and the workshop temperature, but the principle is that a hot panel is still soft and will distort if it is folded, hung or stacked, and that distortion cannot be removed later.
Does reinforcement make a leather bag heavier?
It does, and the effect is cumulative because it applies across the whole panel. Weight is best tracked per panel and totalled for the bag, and choosing a lighter reinforcement that still delivers the required stiffness is usually better than moving to a heavier leather.
How is a fused bond tested?
Practically, with peel and flex tests. A peel test shows whether the adhesive has taken hold and where it fails, and repeated flexing along a fold line shows whether the bond survives the movement the bag will see. Both are simple enough to run in the workshop and should be recorded with their settings.
Does changing the reinforcement require a new sample?
Yes. Changing the leather, the reinforcement, its adhesive coating or the press settings all change the outcome, so each change should be re-sampled and approved. Without that step, a later delivery can be bonded with a different combination and fail months after it ships.
The Bottom Line
Reinforcement is specified, not improvised.
The hidden layer decides how a panel holds its shape, how it responds to moisture and load, how the edge finishes and how heavy the bag feels. Bonding it is a controlled process with three variables that must agree with both the adhesive and the leather.
For buyers, the practical questions are short. Ask which parts of the bag are reinforced and with what, ask for the press settings and the leather’s heat limit, ask how the bond is tested and what the acceptance criteria are, and approve the combination on a finished sample rather than on flat swatches. A supplier that can answer those questions is controlling the panel; one that cannot is discovering the result in the customer’s hands.
